Lemon Blueberry Cloud Cookies

Once, some time ago, I made some soft, melt-in-your mouth cookies and posted them on the internet. A viewer got triggered and insisted that cookies must be crunchy. I have to disagree! Cookies can be crunchy, crisp, soft, chewy, sandy or anything your heart desires. These soft, pillowy cookies are light and airy like little clouds. They could almost be called little cakes. The texture is similar to whoopee pies, but not as sticky. They’re delightfully delicious and have been well-loved by my family for two generations. They’re perfect for a spring teatime treat or alongside a glass of lemonade at a picnic.

Lemon Blueberry Cloud Cookies

Soft, pillowy cookies made with ricotta cheese and fresh blueberries, topped with a tangy lemon icing
Course Dessert
Servings 36 cookies

Ingredients
  

Cookies

  • 2 cups (255g) all purpose flour, sifted
  • 1 teaspoon baking powder
  • ¼ teaspoon fine sea salt
  • ½ cup (113g) unsalted butter, softened
  • 1 cup (240g) ricotta cheese, room temperature
  • Zest of 1 large lemon
  • 1 cup (200g) granulated sugar
  • 1 large egg, room temperature
  • 1 teaspoon pure vanilla extract
  • 1 cup (142g) blueberries plus extra for the tops

Icing

  • 1 ½ cups (181g) powdered sugar, sifted
  • 1 tablespoon (14g) unsalted butter, melted
  • 1 dash fine sea salt
  • 2-3 tablespoons (30-45ml) lemon juice

Instructions
 

Cookies

  • Preheat the oven to 350ºF (180ºC). Line two cookie sheets with parchment paper.
  • In a medium-size bowl, whisk together the flour, baking powder and salt until well combined.
  • In a large bowl, beat the butter, with an electric mixer on medium speed, until smooth Add the ricotta cheese, sugar and lemon zest. Beat until well combined. Beat in the egg and vanilla until incorporated. On low speed, gradually mix in the flour mixture, just until combined. Fold in the blueberries.
  • Place rounded tablespoon-size portions of dough about 2 inches apart onto the cookie sheets. Top the cookies with additional blueberries. (If your cookie dough is sticky and hard to work with, refrigerate it just until it's easier to work with, about 30 minutes to 1 hour.)
  • Bake until the bottom edges of the cookies are lightly browned, about 11-13 minutes. Transfer the cookies to a cooling rack. Top the cooled cookies with icing. Best eaten the day they're made.

Icing

  • In a medium-size bowl, whisk together the powdered sugar, melted butter, salt and 1 tablespoon (15ml) of lemon juice until well combined. Add additional lemon juice as needed to achieve the desired consistency. Whisk until smooth.
Keyword cookies, lemon blueberry

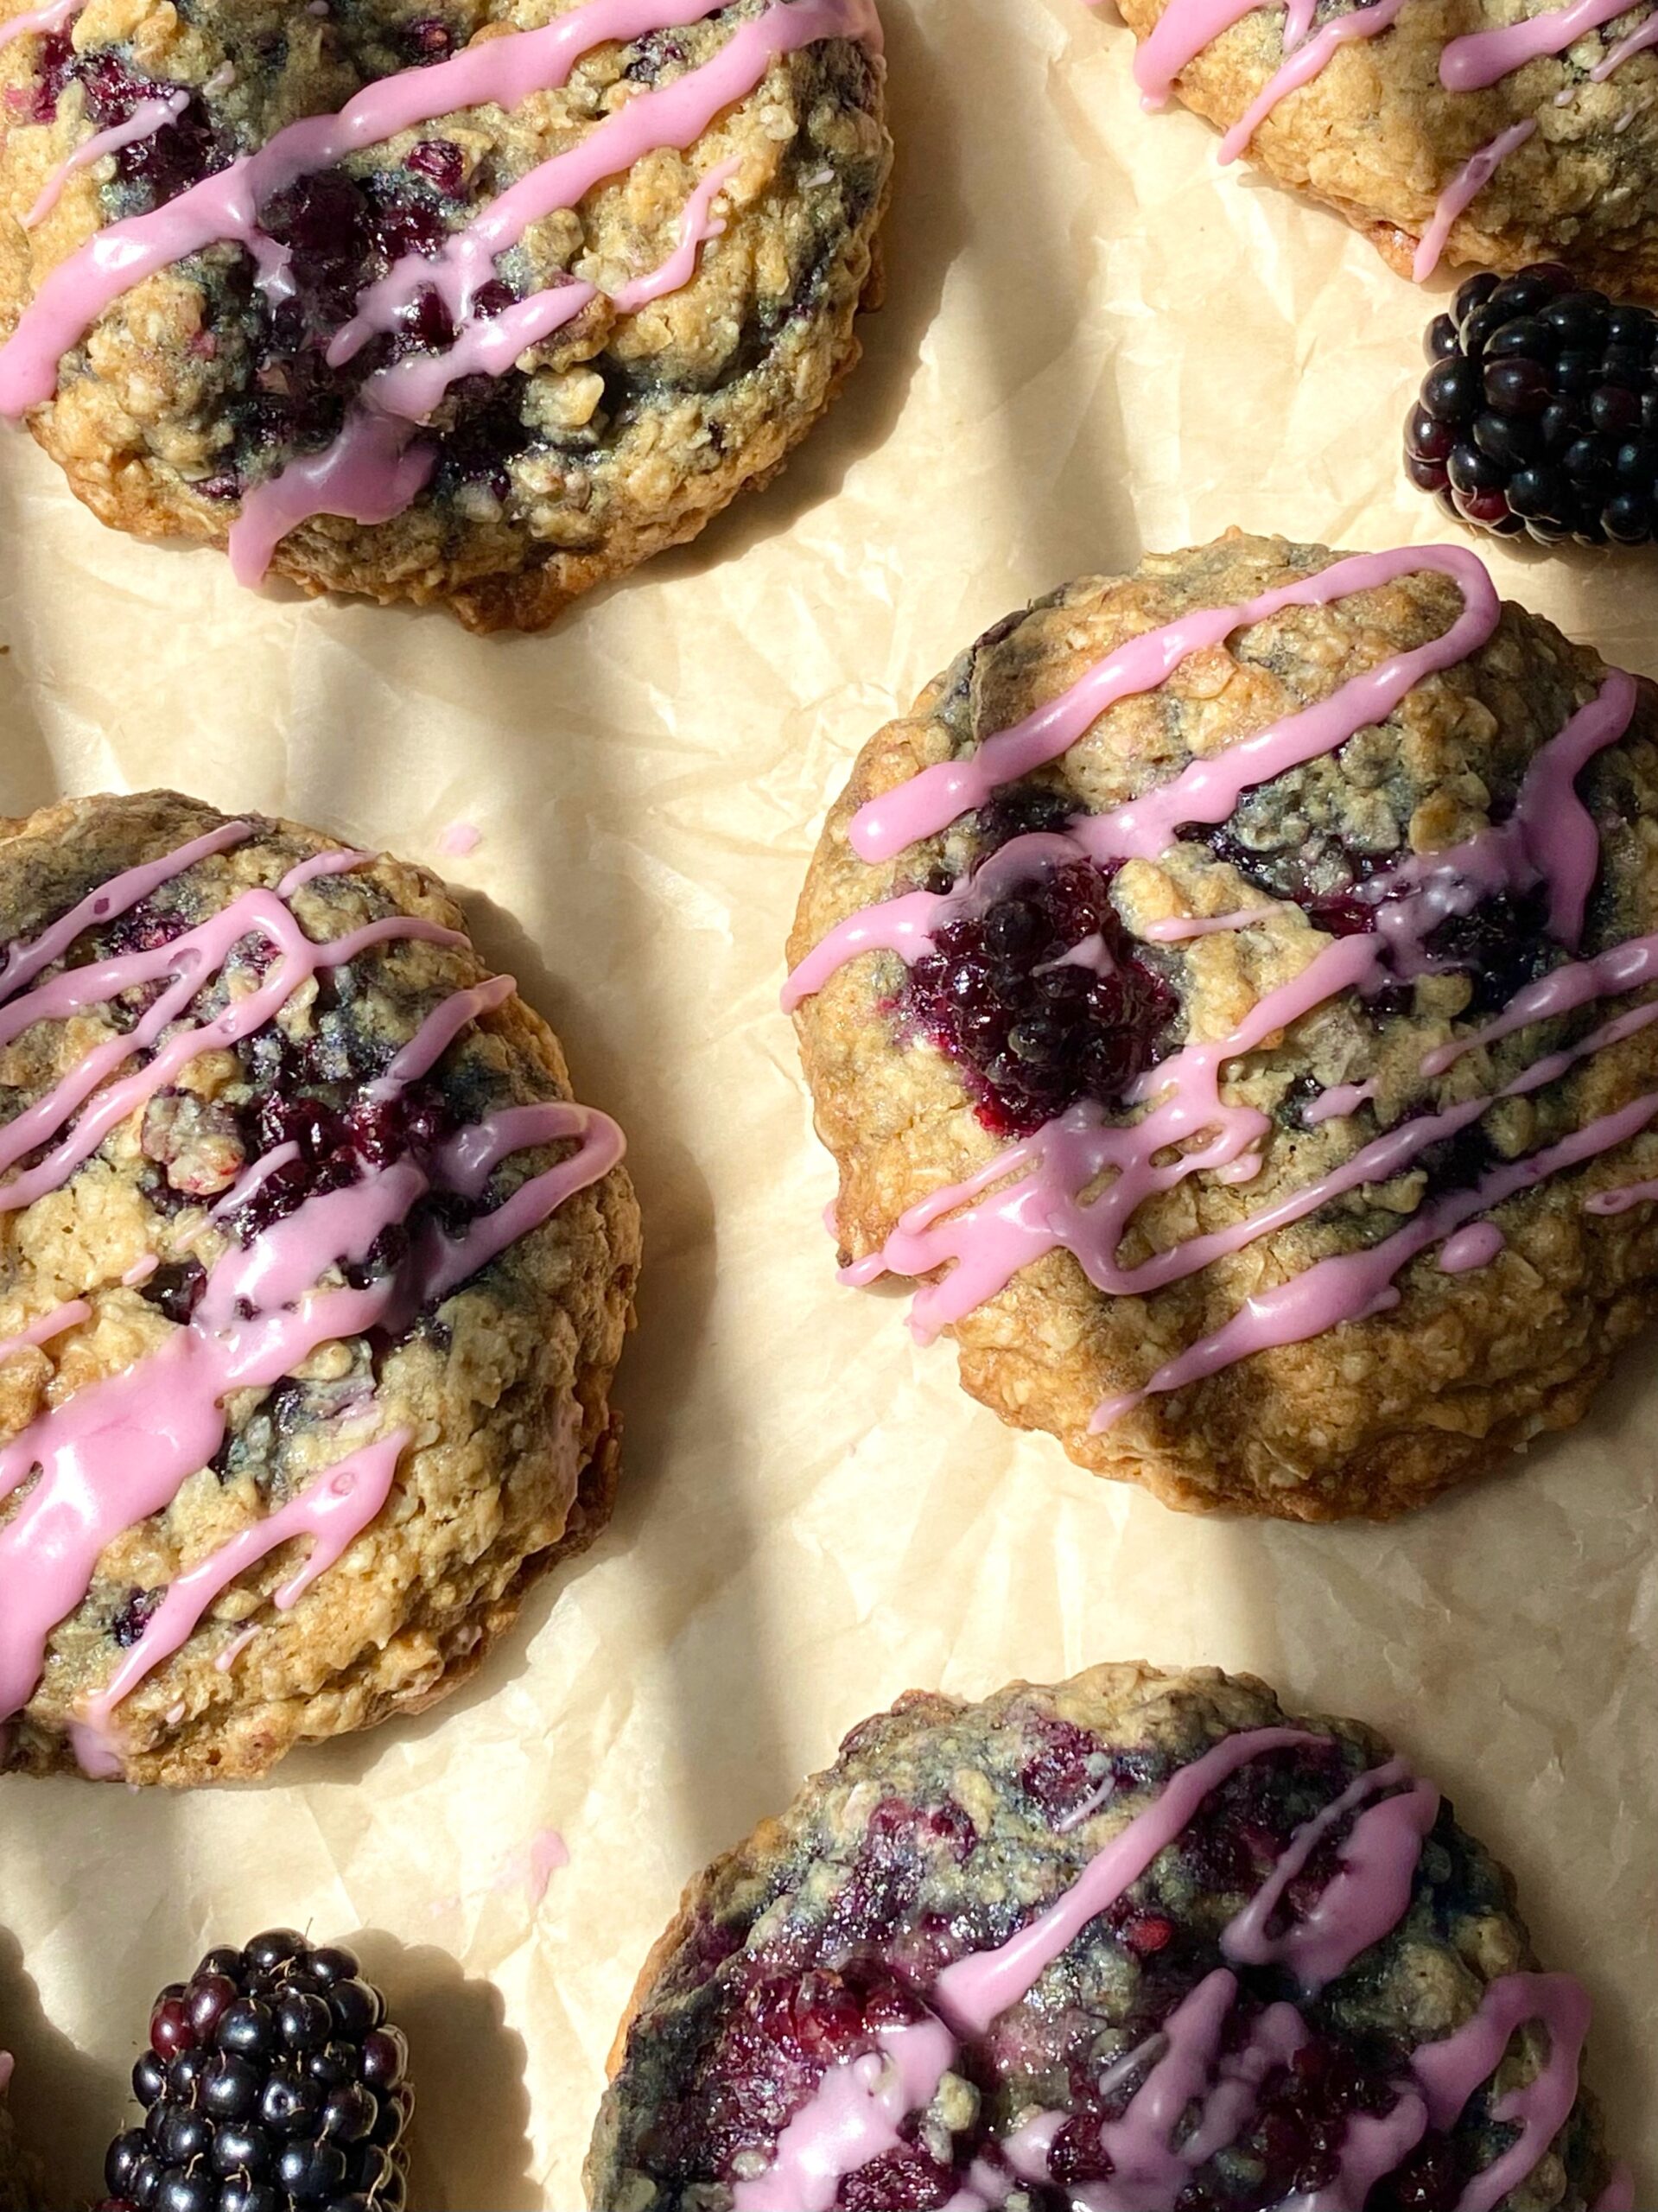
Blackberry Oatmeal Cookies

Blackberry Oatmeal Cookies by Brownie Mischief

We’ve all heard our parents telling their childhood stories of walking miles to school and suffering worse hardships than we ever had to. My mom used to tell me stories like that, but she had a sense of humor, so her stories were always fun to listen to. She used to tell me about her friend’s mother, who would make big, delicious oatmeal cookies. My mom would trade her baloney sandwich nearly every day to get one of those cookies from her friend. She reminisced about those cookies so much, that I set out to make her some when I learned to bake. She and my grandmother would taste test batch after batch of my cookies over the years. I have probably baked enough oatmeal cookies to circle the earth. Okay that’s an exaggeration, but seriously I have baked quite a few. Of all the oatmeal cookies I’ve baked, these are one of my favorites!

Most of the time when you see fruit added to an oatmeal cookie, it’s dried fruit, like raisins or cranberries. That’s mostly because if you just dump fruit into your cookie dough, the fruit releases water, leaving soggy spots in your cookies. To solve that issue, for this recipe, I macerate the blackberries before baking. The purple blackberry juice that’s released from the berries is used to make a beautiful lilac icing to drizzle over the cookies.

Blackberry Oatmeal Cookies

Course Dessert
Servings 18 cookies

Ingredients
  

Brown Butter

  • ½ cup (4oz or 113g) unsalted butter

Macerated Berries

  • 2 cups (about 8-10 oz or 227-283g) fresh blackberries Cut large berries in half
  • 2 tablespoons (25g) granulated sugar

Oatmeal Cookies

  • 1 ¾ cups (7 7/8 oz or 223g) all purpose flour, sifted
  • 1 teaspoon baking soda
  • 1 teaspoon fine sea salt
  • ½ teaspoon ground cinnamon
  • ½ cup (4 or 113g) unsalted butter, softened
  • 1 ¼ cups (8 3/4 oz or 250g) packed brown sugar
  • 2 large eggs
  • 1 ½ teaspoons pure vanilla extract
  • 3 cups (10 oz or 283g) quick oats Not instant oats

Icing

  • ¾ cup (3 oz or 85g) powdered sugar, sifted
  • 1 tablespoon heavy cream
  • 2-3 tablespoons reserved juice from blackberries

Instructions
 

  • In a small, light colored saucepan, melt 1/2 cup (4 oz or 113g) of butter over medium heat, stirring occasionally, until deep golden and fragrant. Keep a close eye on it. It can go from toasted to burned very quickly. When you see brown particles form, remove from heat and immediately transfer the butter, including the particles, to a small bowl. Refrigerate until solid, about one hour.
  • Place the blackberries in a medium-size bowl. Sprinkle with granulated sugar and toss to coat. Let sit for 30 minutes until the berries release their juices.
  • Drain the blackberries and reserve the juices.
  • Preheat oven to 350ºF (180ºC). Line two large cookie sheets with parchment paper.
  • In a separate medium-size bowl, whisk together the flour, baking soda, salt and cinnamon. Set aside.
  • In a large bowl, beat the brown butter, softened butter and brown sugar until light and fluffy.
  • Add the eggs and vanilla extract in three separate additions and beat until well combined.
  • Stir in the flour mixture just until combined. Stir in the oats just until combined. Gently fold in the blackberries.
  • Scoop 1/4 cup sized portions of dough, about 2 inches apart, onto the prepared cookie sheets. *I used a #16 2-ounce scoop.
  • Bake until the cookie tops are set and the edges are golden brown, about 13-15 minutes. Transfer the cookies to a cooling rack to cool completely.
  • Pass reserved blackberry juice through a sieve to remove the seeds.
  • In a small bowl, whisk together the powdered sugar, heavy cream and one tablespoon of the reserved blackberry juice until smooth. Add more blackberry juice, a little at a time, until the desired consistency is reached. Drizzle the icing over the cooled cookies.

Notes

*To find the portion scoop I used, click here.
Keyword blackberry, cookies

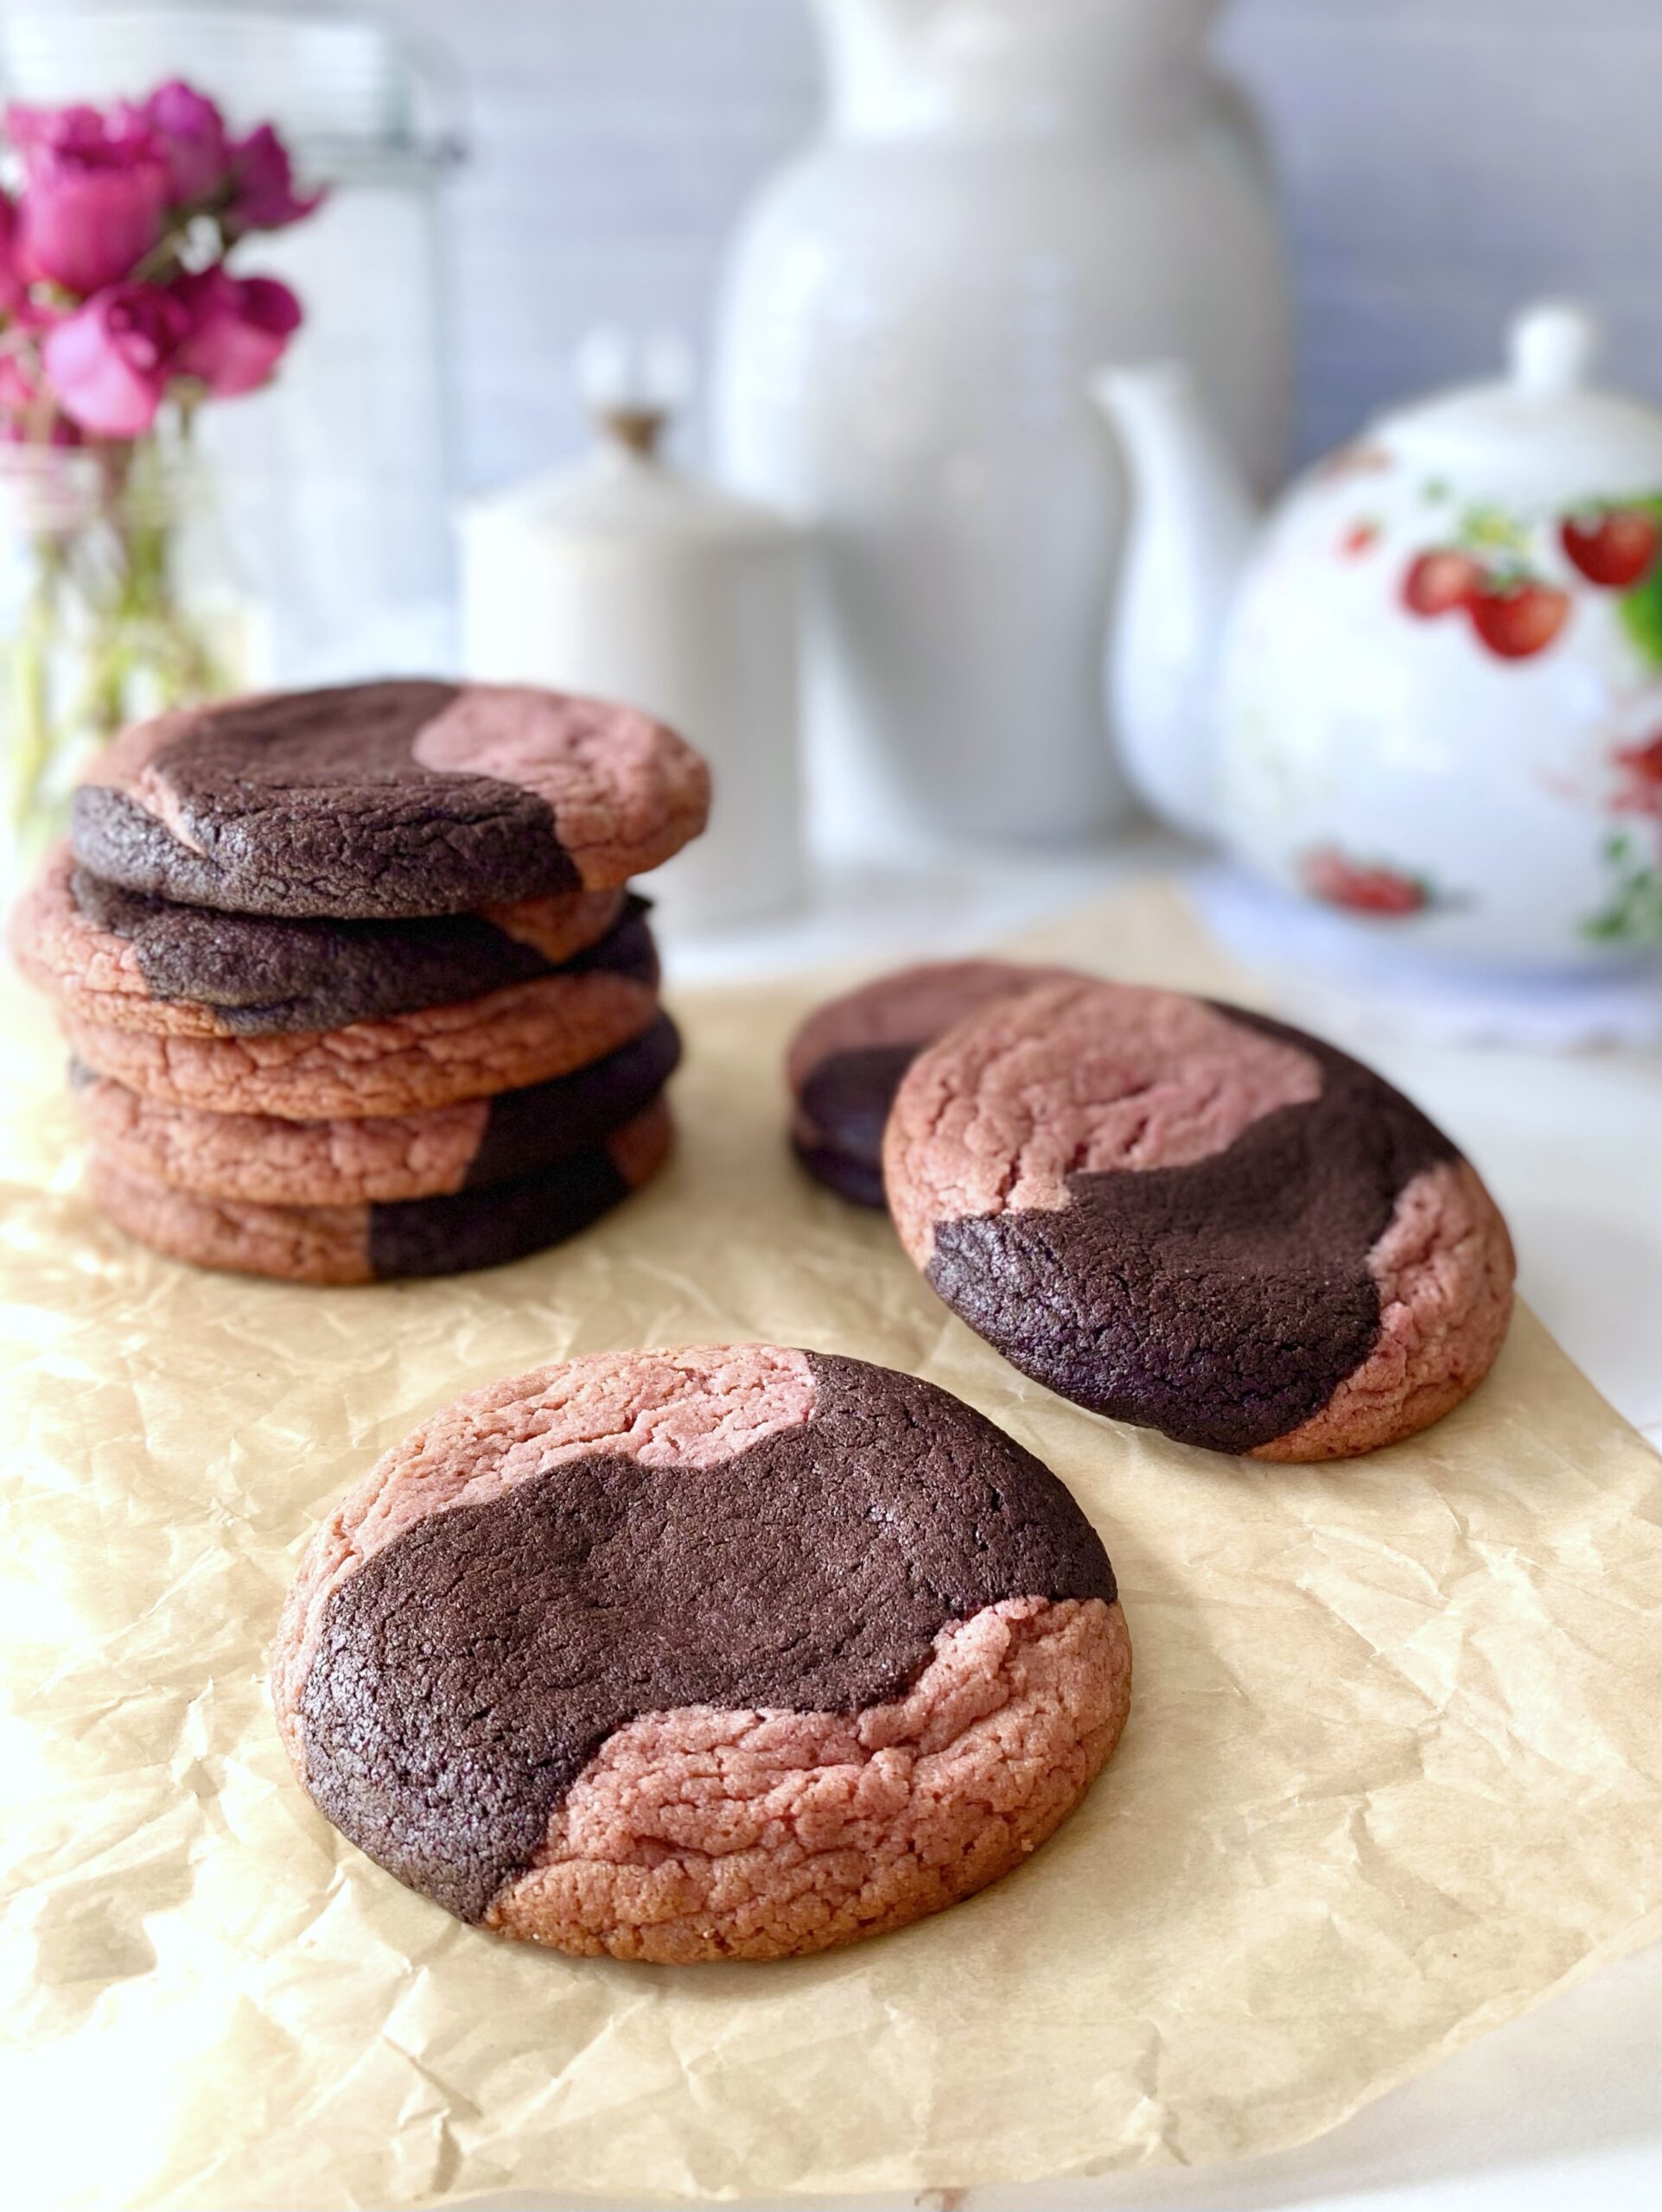
Dark Chocolate Strawberry Marble Cookies

Dark Chocolate Strawberry Marble Cookies

To the indecisive German baker who invented marble cake, I thank you! Marble cake, sampler platters and tasting flights are the perfect solution for those times when you just can’t decide. Let’s take one more decision off the table. No longer will we have to decide between chocolate and strawberry cookies. These marble cookies are the best of both worlds. Chocolate and strawberry are opposites in many ways, but complement each other so well. After all, who doesn’t love chocolate covered strawberries?

The dark chocolate cocoa powder gives these cookies a deep chocolate flavor. Freeze dried strawberries provide the sweet strawberry flavor and color. I crushed the strawberries with a mini food processor, but you can also use a mortar and pestle, a clean spice grinder or a sturdy plastic bag and a rolling pin. When you crush the 1 1/2 cups of freeze dried strawberries called for in the recipe, you’ll end up with about 1/3 cup of strawberry powder. To find freeze dried strawberries, click here.

This recipe makes about eighteen cookies but you can also make nine large cookies. Follow the instructions in parentheses for large cookies.


Dark Chocolate Strawberry Marble Cookies

by Mari Vasseur
Dark chocolate & strawberry marbled sugar cookies
Course Dessert
Servings 18 cookies

Ingredients
  

  • 2 ¼ cups (284g) all purpose flour, sifted
  • 1 teaspoon baking soda
  • 1 teaspoon fine sea salt
  • 1 cup (227g) unsalted butter, softened
  • 1 cup (200g) granulated sugar
  • ½ cup (100g) packed brown sugar
  • 2 large eggs
  • 1 teaspoon pure vanilla extract
  • 1 ½ cups (35g) freeze-dried strawberries, finely crushed to a powder (1 1/2 cups before crushing)
  • â…“ cup (28g) dark unsweetened cocoa powder

Instructions
 

  • In a medium-sized bowl, whisk together the flour, baking soda and salt until well blended.
  • In a large bowl, beat the butter, granulated sugar and brown sugar, with an electric mixer at medium speed, until pale and fluffy.
  • Beat in the eggs and vanilla extract in three separate additions, making sure each addition is incorporated before adding the next. On low speed, mix in flour mixture just until combined.
  • Divide the dough in half. Leave half of dough in the bowl and place the other half in a separate bowl.
  • Add the freeze dried strawberries to half of the dough and mix just until combined. Add the cocoa powder to the other half of the dough and mix just until combined.
  • Roll the dough into 1 1/2 teaspoon size balls. (For large cookies, roll the dough into tablespoon size balls.) To form the cookies, place two chocolate dough balls and two strawberry dough balls in your hand in a checkerboard pattern. Roll into a ball. Repeat with the remaining dough balls and refrigerate for 30 minutes.
  • Preheat oven to 350ºF (180ºC). Line two large cookie sheets with parchment paper.
  • Place the dough balls about two inches apart on the prepared cookie sheets. Bake 10-12 minutes, until cookies are set and edges are golden. (For large cookies, bake 14-15 minutes.) Transfer to cooling rack. (For large cookies, cool on cookie sheet one minute, then transfer to cooling rack.
Keyword chocolate, cookies, marble, strawberry

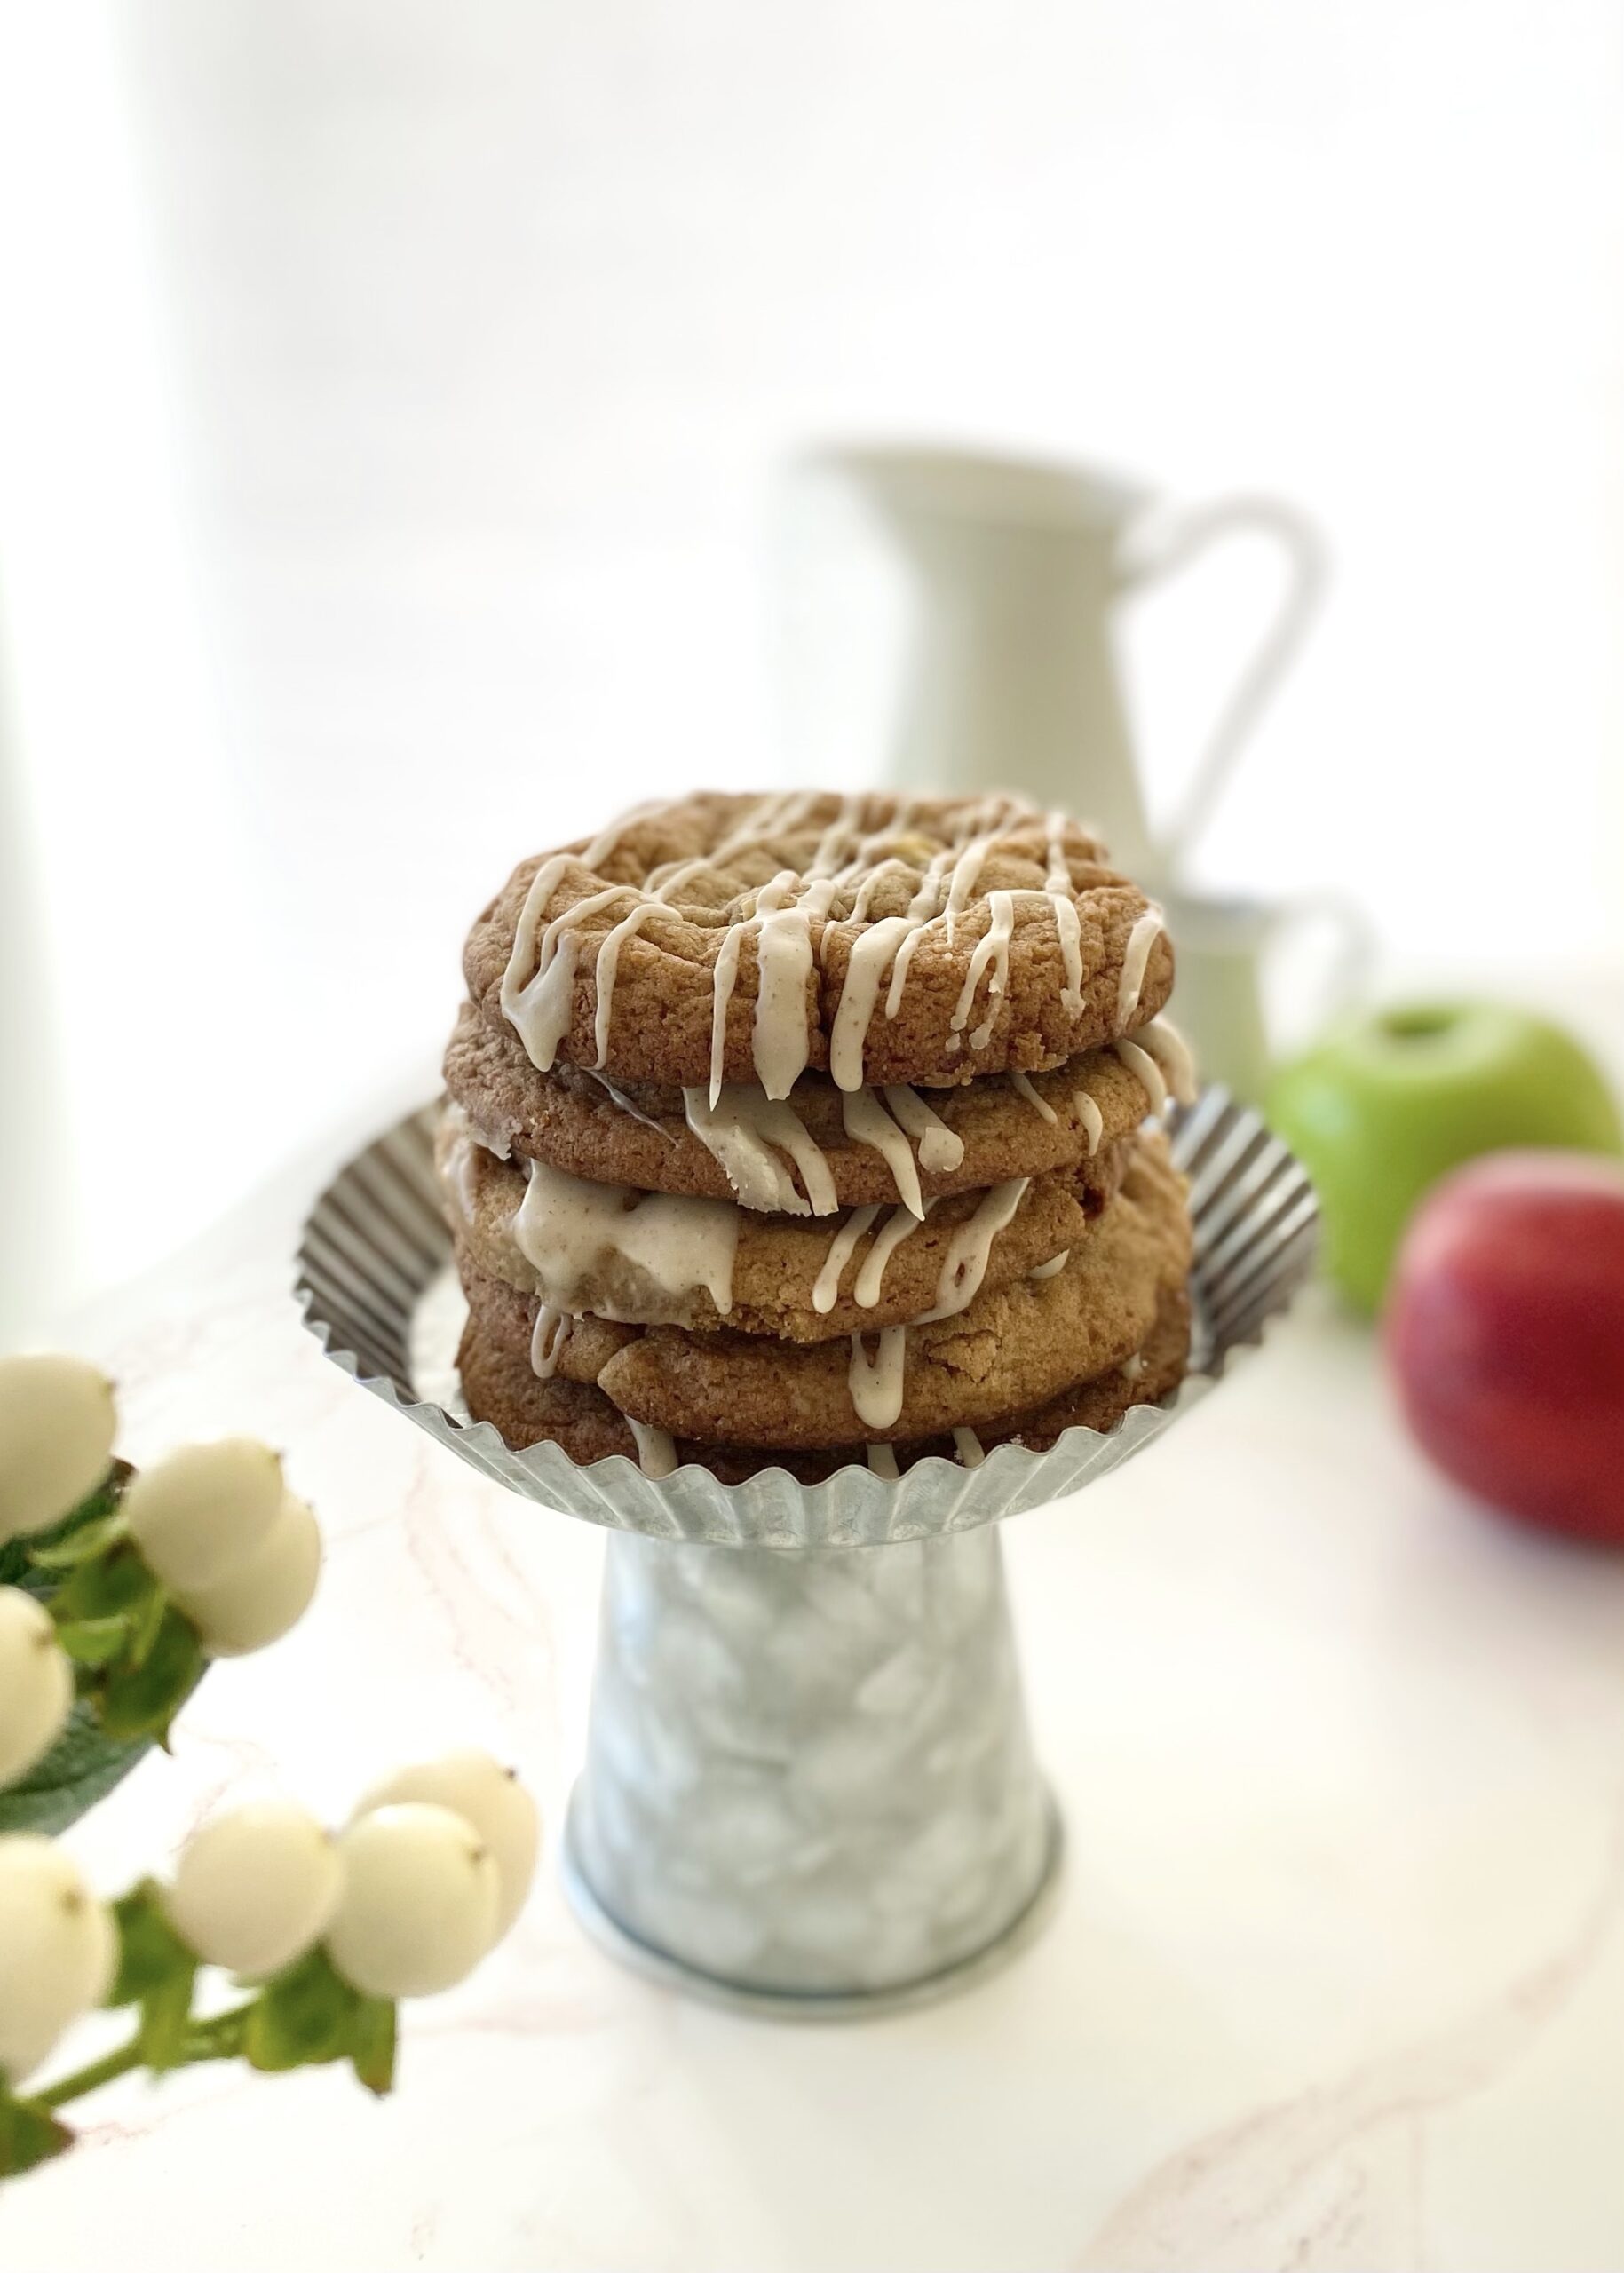
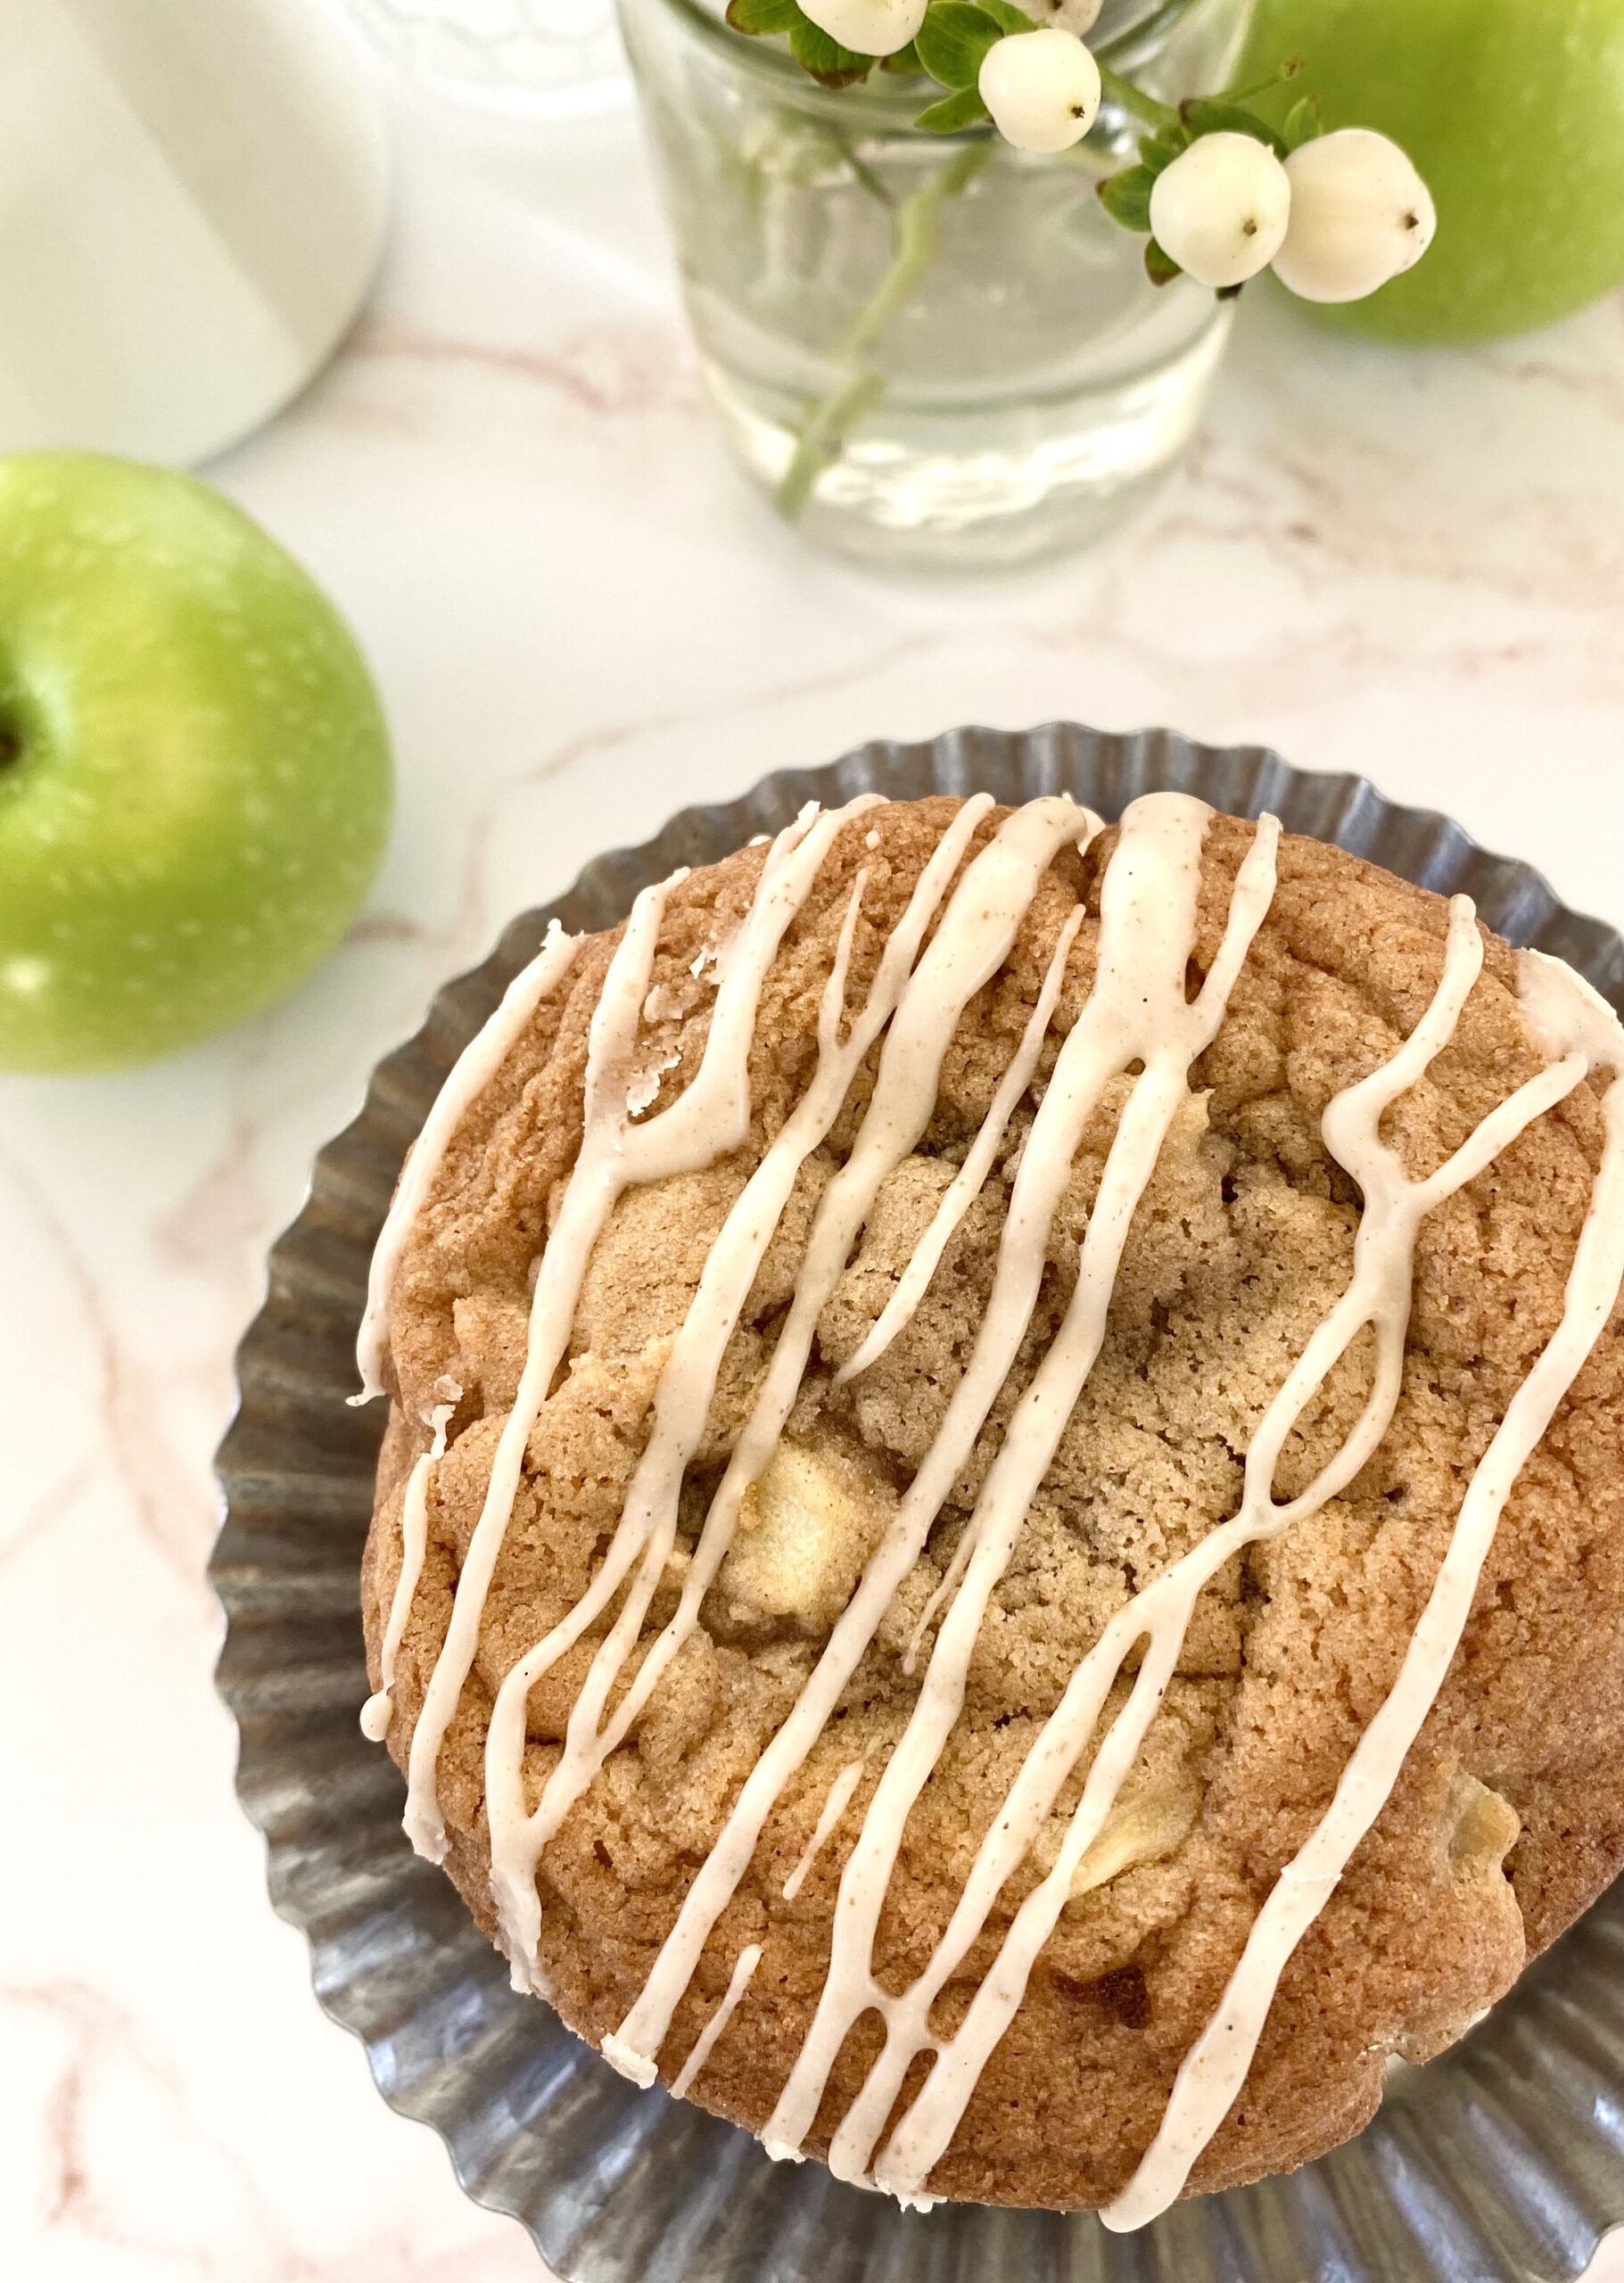
Apple Spice Cookies with Brown Butter Icing

Apple Spice Cookies with Brown Butter Icing

These Apple Spice Cookies were one of my most popular cookies last fall so I decided to bring them back a little early this year. The combination of cinnamon, nutmeg and vanilla in this cookie dough will remind you of cinnamon rolls and apple pie and inspire you look forward to fall.

The apples in this recipe are cooked briefly on the stovetop to bring out the flavor and create the perfect texture. Dropping raw apple chunks into cookie dough or cake batter is usually not a good idea. If you’ve ever baked an apple pie, you know that apples release liquid as they cook and that liquid will end up in your baked cookies, creating soggy spots. So definitely don’t skip this step!

These gorgeous, golden brown cookies are perfectly delicious on their own, but extra credit goes to the Brown Butter Icing for taking them over the top!

apple spice cookies with brown butter icing

Make sure to head over to Instagram to watch the video of these Apple Spice Cookies being created: Click here

Apple Spice Cookies with Brown Butter Icing

Spice cookies with fresh apples and brown butter icing
Course Dessert
Servings 12 cookies

Ingredients
  

Cooked Apples

  • 1 tablespoon butter
  • 1 cup (4 oz or 113g) chopped apples (1/4-inch pieces) I used one large Granny Smith apple
  • 1 tablespoon sugar
  • ¼ teaspoon ground cinnamon

Apple Spice Cookie Dough

  • 1 ½ cups (6 3/4 oz or 191g) all purpose flour, sifted
  • ½ teaspoon baking soda
  • ½ teaspoon salt
  • 1 teaspoon ground cinnamon
  • ¼ teaspoon ground nutmeg
  • ½ cup (4 oz 113g) unsalted butter, softened
  • 1 cup (7 oz or 200g) packed brown sugar
  • 1 large egg
  • 1 large egg yolk
  • ½ teaspooon pure vanilla extract

Brown Butter Icing

  • 2 tablespoons unsalted butter
  • ½ cup (2 oz or 57g) powdered sugar, sifted
  • ½ teaspoon pure vanilla extract
  • pinch fine sea salt
  • 1-2 tablespoons whole milk

Instructions
 

Cooked Apples

  • Melt the butter in a small skillet over medium heat. Add apples, sugar and cinnamon to the skillet.
  • Cook, stirring occasionally, until the apples are tender, about 4-5 minutes.
  • Remove from heat and let cool completely. Drain any excess liquid from the cooled apples.

Apple Spice Cookies

  • Preheat the oven to 375ºF (190ºC). Line two large baking sheets with parchment paper.
  • In a medium bowl, whisk together the flour, baking soda, salt, cinnamon and nutmeg. Set aside.
  • In a large bowl, beat the butter and brown sugar with an electric mixer at medium speed until light and fluffy.
  • Beat in the egg, egg yolk and vanilla extract, one at a time, until well combined
  • Stir in the flour mixture, just until combined.
  • Fold the the cooled apples into the cookie dough.
  • Divide the dough into 12 equal golf ball size portions and place them 3 inches apart on the prepared baking sheets.
  • Bake until golden brown, about 11-13 minutes. Let cool 1 minute on the baking sheet, then transfer to a cooling rack to cool completely.

Brown Butter Icing

  • In a small saucepan, cook the butter over medium heat until golden brown and fragrant. When brown specks start to form in the bottom of the pan, remove from heat.
  • Immediately transfer the browned butter to a small bowl. Whisk in the the powdered sugar, vanilla extract, salt and 1 tablespoon milk. Add more milk as needed to reach desired consistency.
  • Drizzle the icing over the cooled cookies.

Notes

NOTE:  If your cookies spread too much when baking, refrigerate dough for 30 minutes, then bake as directed.
Keyword cookies, holiday, thanksgiving

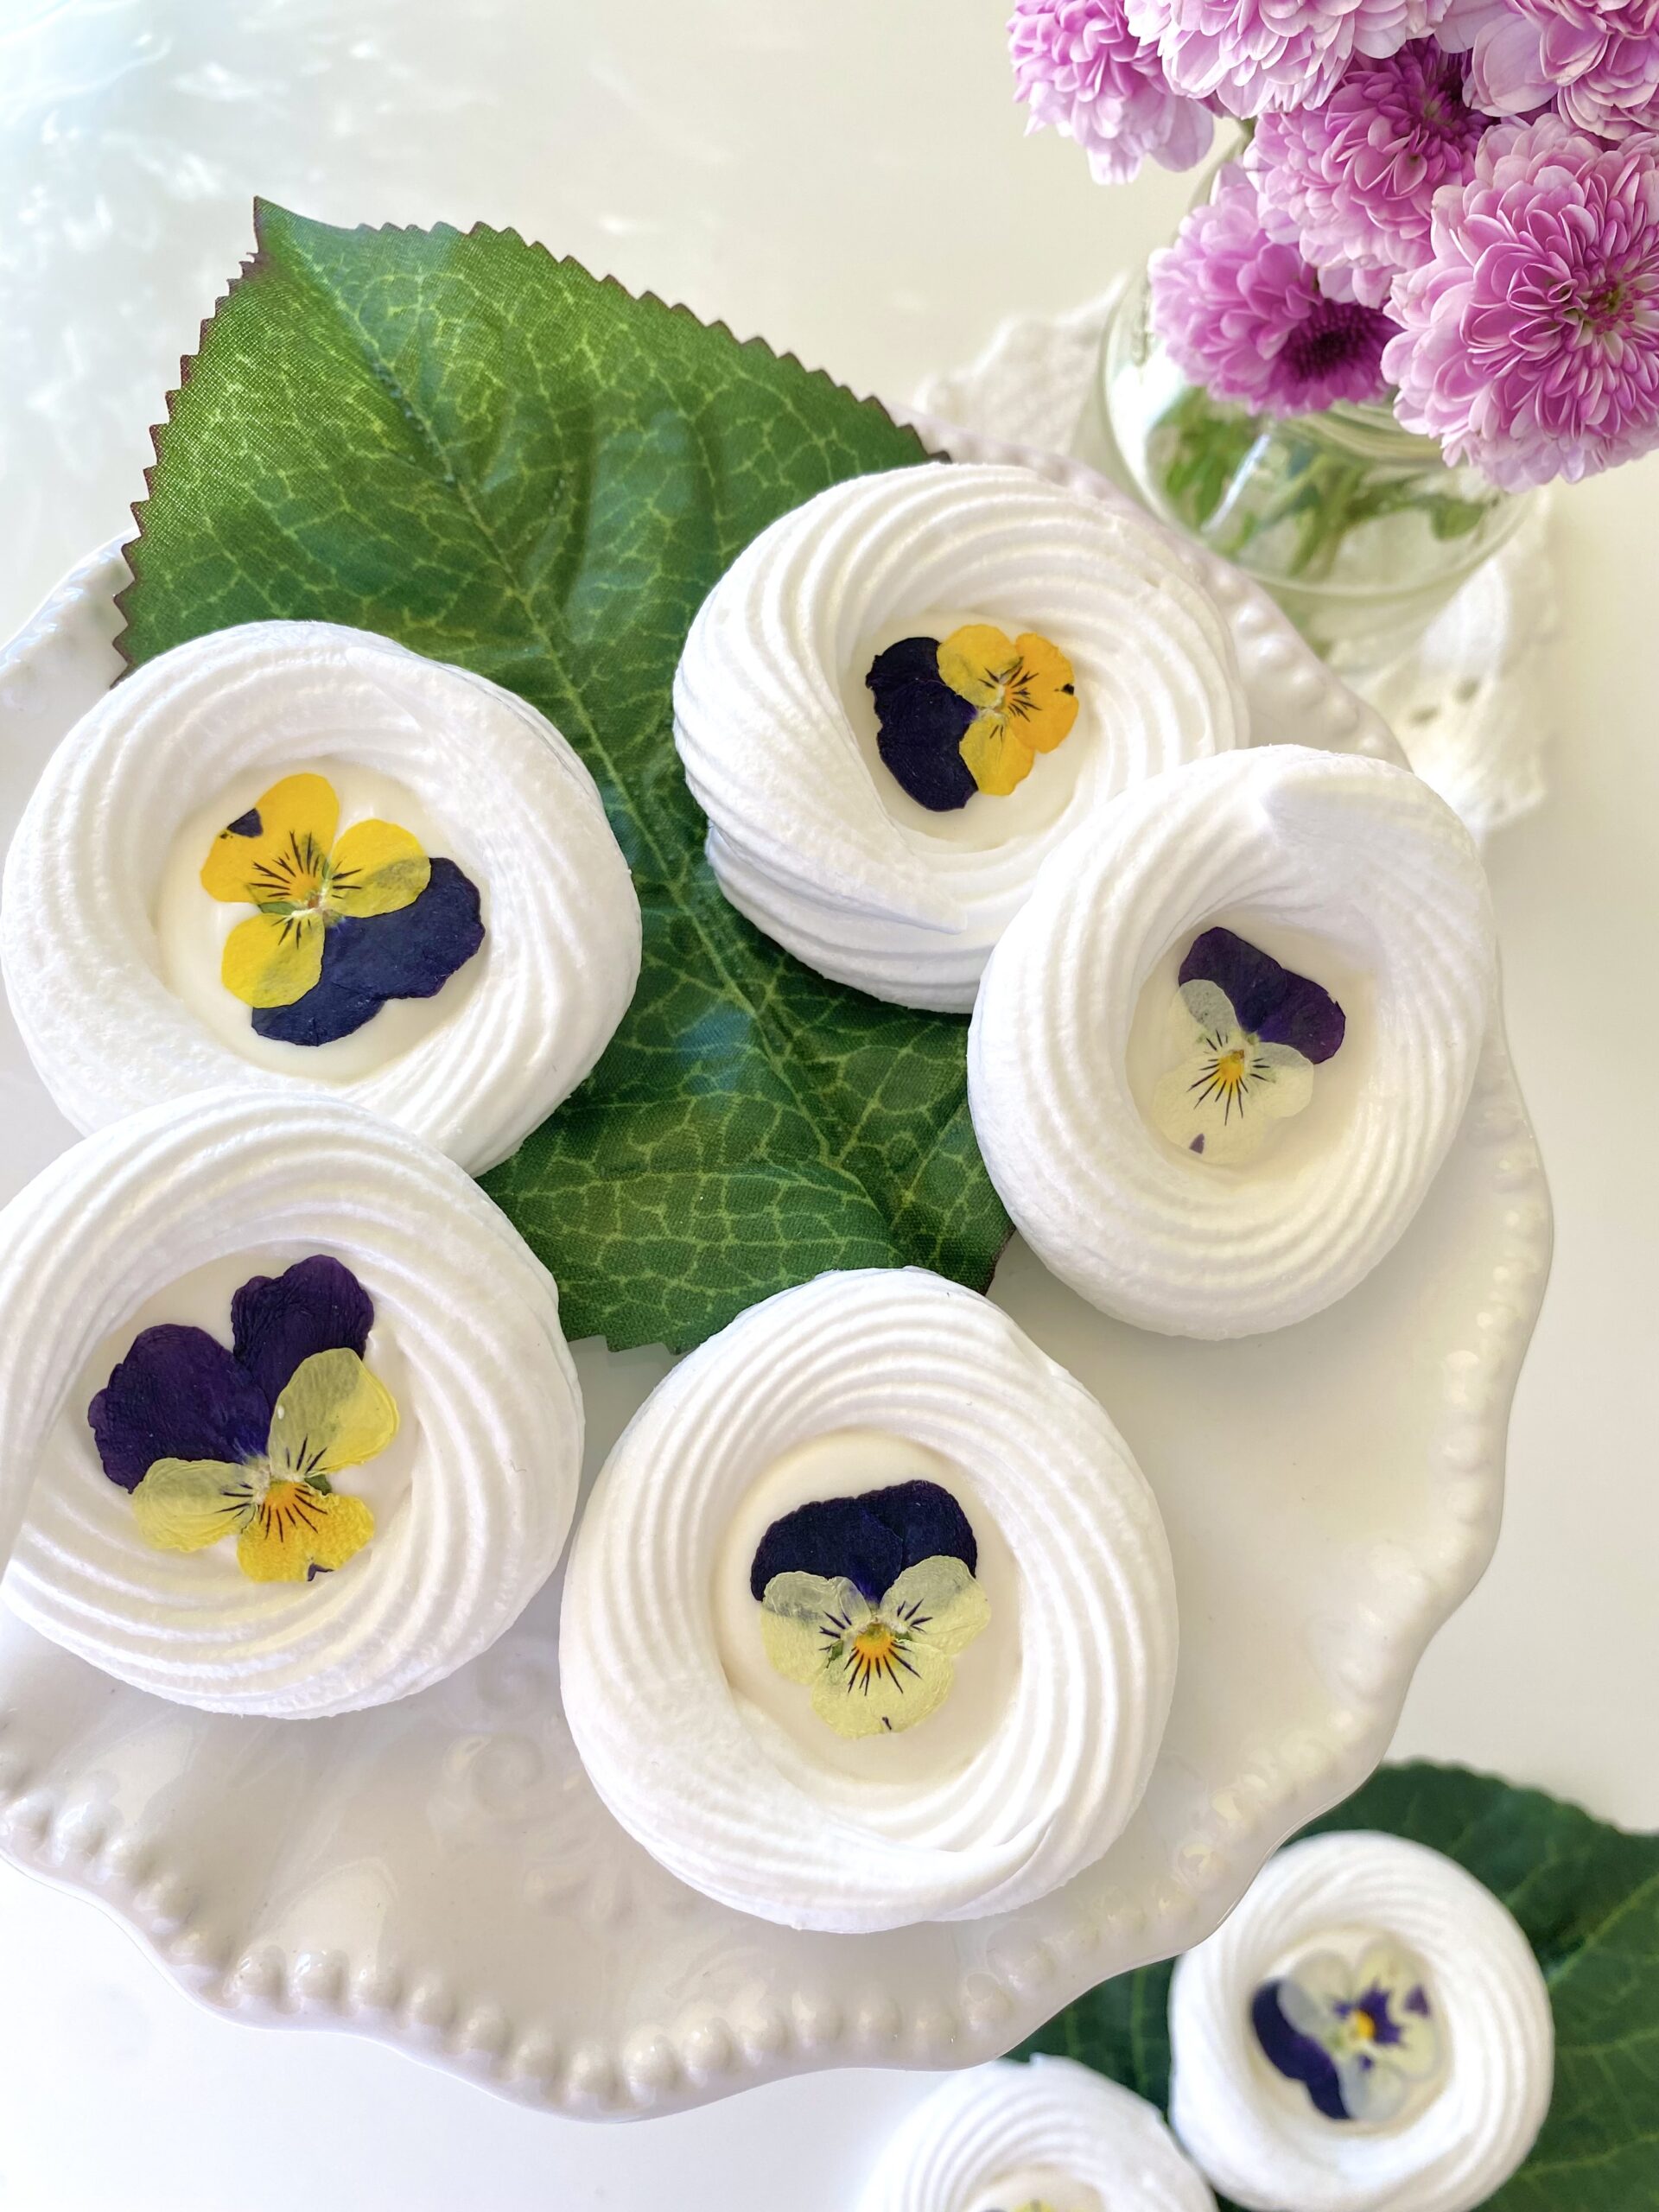
Fairy Tale Meringues

Fairy tale meringue cookies

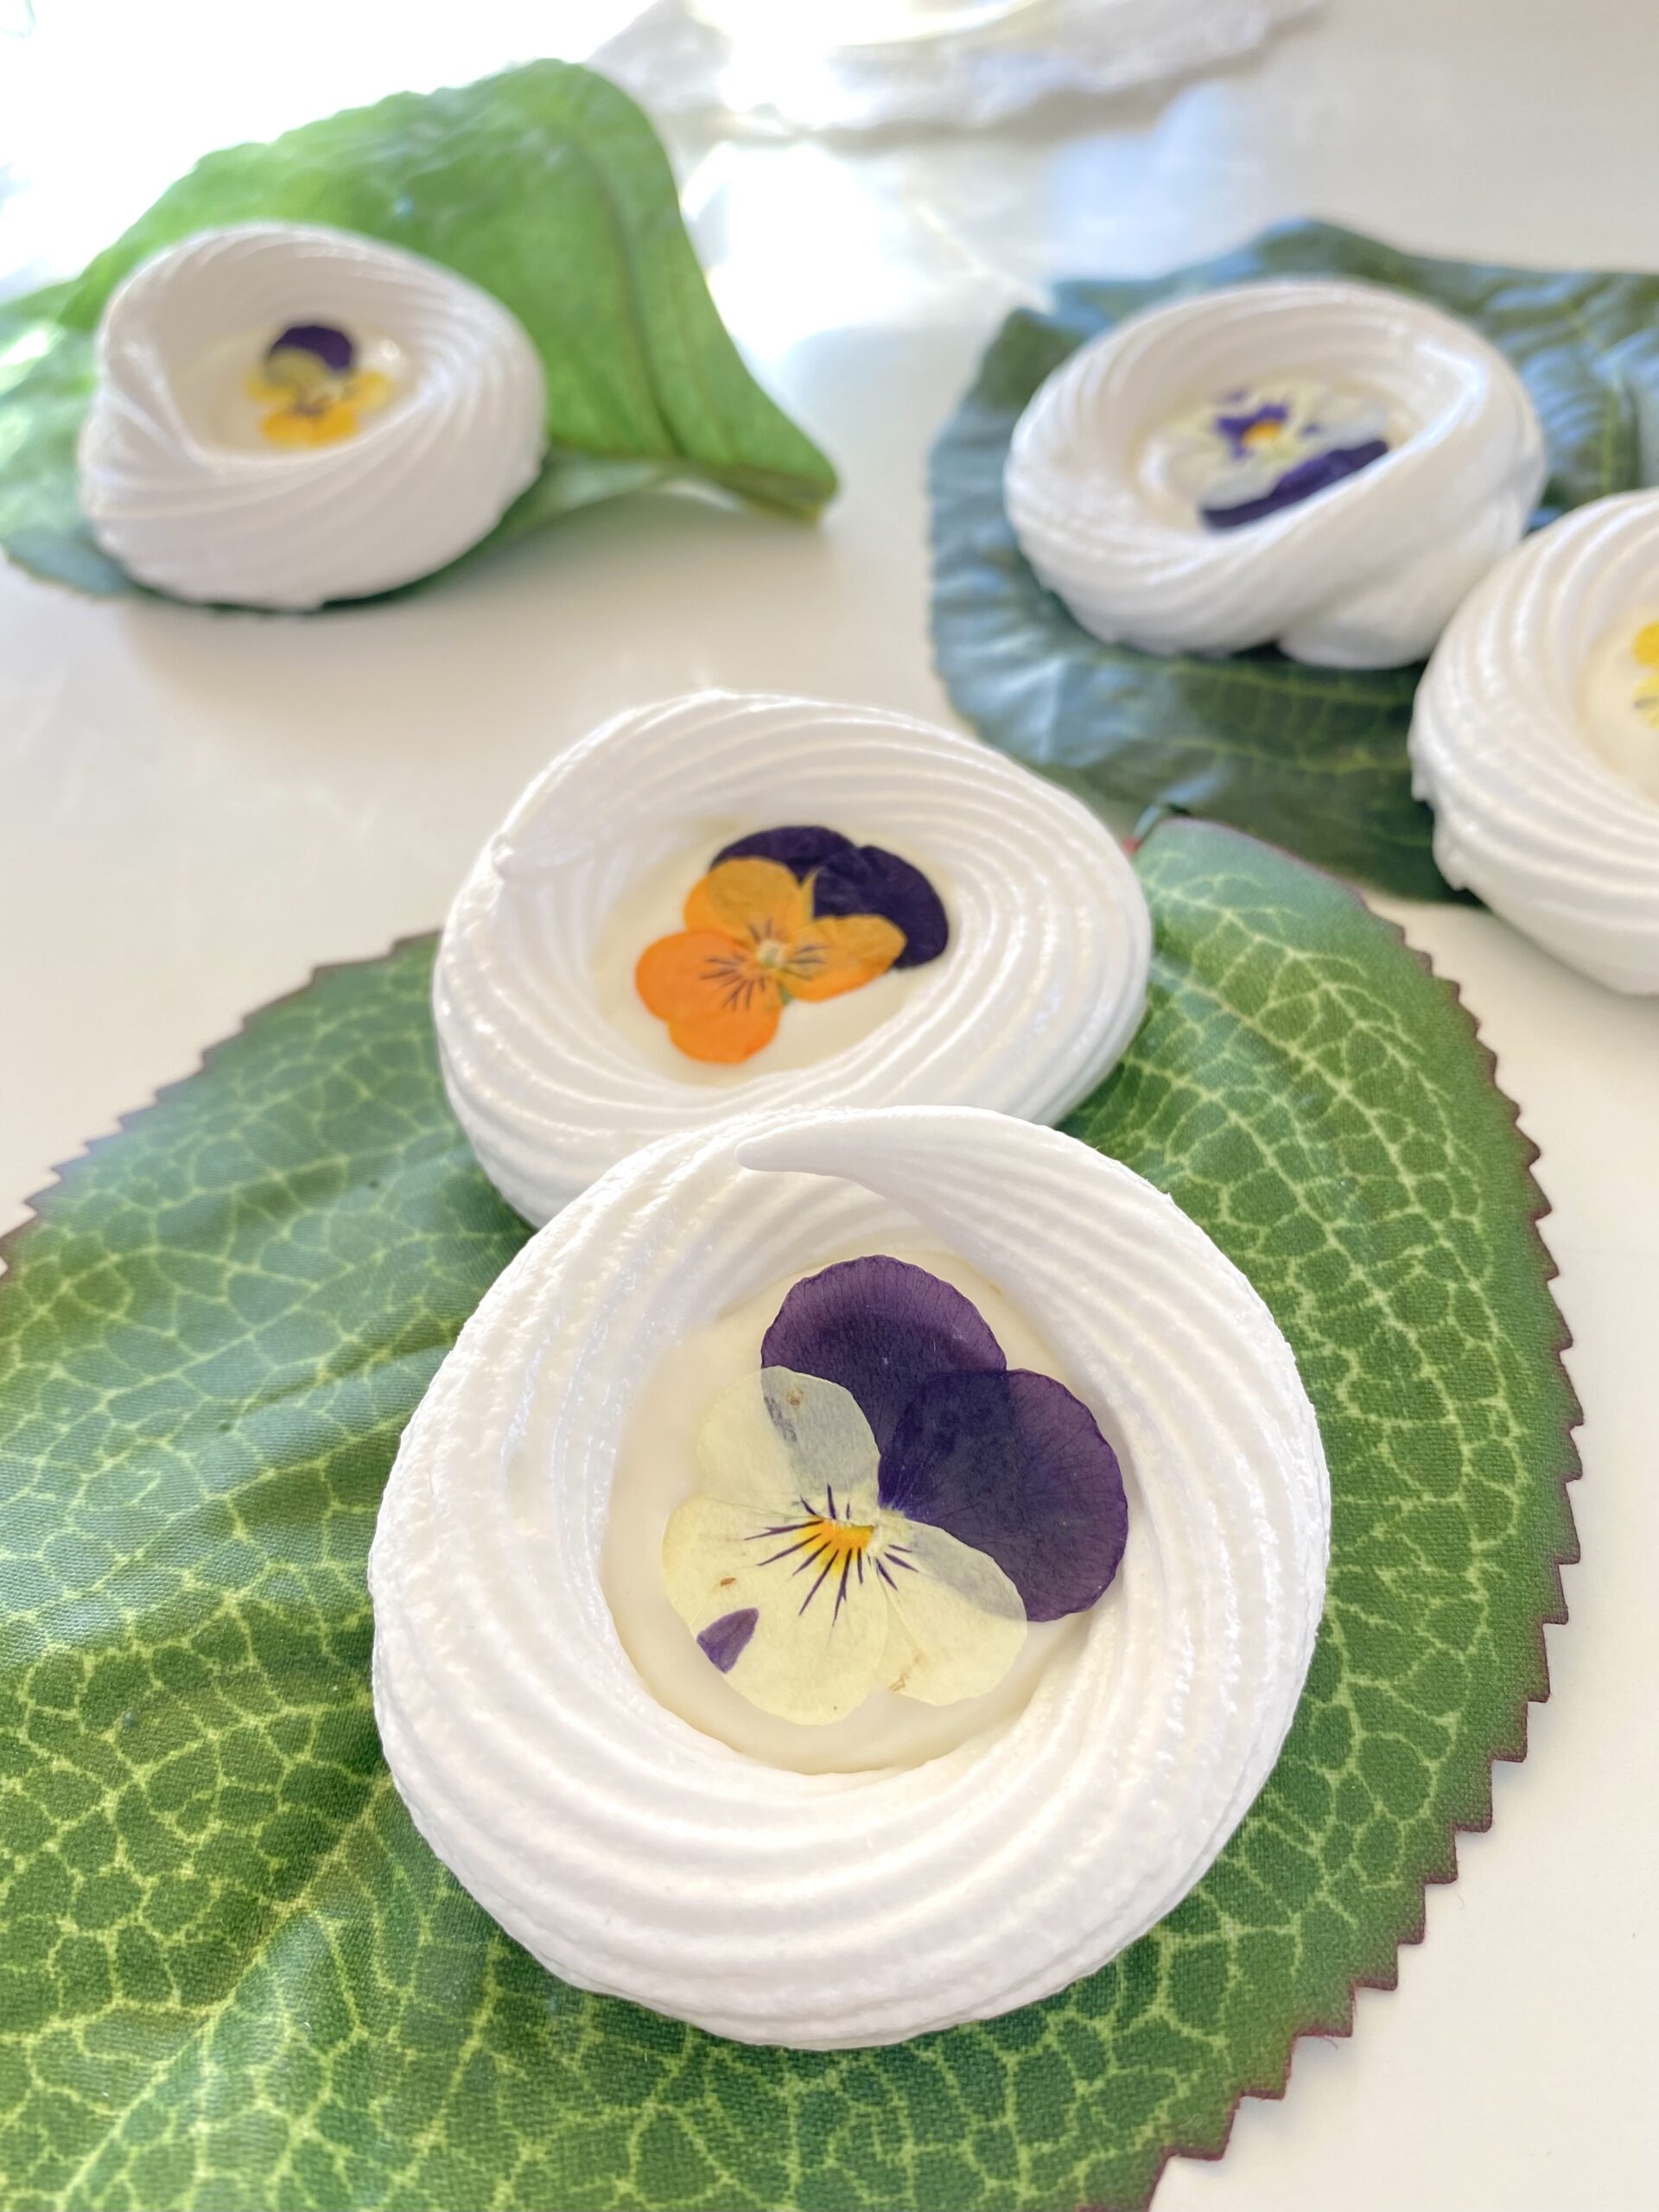
Sometimes we need a little magic in our lives. These pretty, dainty meringue cookies sparked a bit of magic in my life that I want to share with you. It started when I washed some beautiful little violas. Watching them float in a bowl of clear water was positively therapeutic. After pressing and weighing them down with a heavy book overnight, the reveal of perfectly flat, delicate blossoms was so satisfying. The process of making meringue is also very satisfying for me. I love the moment when the frothy egg and sugar mixture magically turns to glossy, billowy sweetness.

Piping the meringue circles was fun! I traced circles on the bottom of the parchment paper to use as a guide for stress-free piping. I used white chocolate to fill the center of the meringue circles, but you can also use white chocolate chips or candy melts. You can use any small edible flowers or flower petals. Feel free to express your creativity! Try using sprinkles, edible glitter or tint the meringue mixture with a few drops of gel food color.

fairy tale meringue cookies


Fairy Tale Meringues

by Mari Vasseur
Meringue cookies filled with white chocolate and topped with pressed edible flowers
Course Dessert
Servings 24 cookies

Ingredients
  

Pressed edible flowers

  • 24-30 small edible flowers

Meringue cookies

  • 4 large egg whites
  • ½ teaspoon cream of tartar
  • 1 cup (200g) fine granulated sugar
  • â…› teaspoon pure almond extract
  • 1 cup (170g) chopped white chocolate or white chocolate chips

Instructions
 

Pressed edible flowers

  • Gently wash the edible flowers. Pat dry with paper towels.
  • Press between parchment paper. Weigh down with a heavy book for at least 24 hours.

Meringue cookies

  • Beat the egg whites, with an electric mixer at medium speed, until frothy. Add the cream of tartar and beat to soft peaks. Continue beating and gradually add thensugar and almond extract.
  • Turn mixer to up to high speed and beat to glossy, stiff peaks.
  • Preheat oven to 200ºF (95ºC. Line two large baking sheets with parchment paper.
  • Transfer the whipped meringue to a piping bag fitted with a large star tip. I used Ateco #864*
  • Pipe 2-inch circles about an inch apart onto prepared baking sheets.
  • Bake for one hour. Turn off the oven and let the meringues cool in oven.
  • In a microwave safe container, microwave white chocolate for 10 second intervals until melted or melt on the stovetop in a double boiler.
  • Transfer the melted white chocolate to a squeeze bottle or a piping bag. Fill the centers of the meringue circles with white chocolate. Top each one with a pressed flower. Let chocolate set at room temperature. Do not refrigerate.

Notes

*To find Ateco tip #864, click here.
Keyword cookies, meringues

Cherry Blossom Cookies

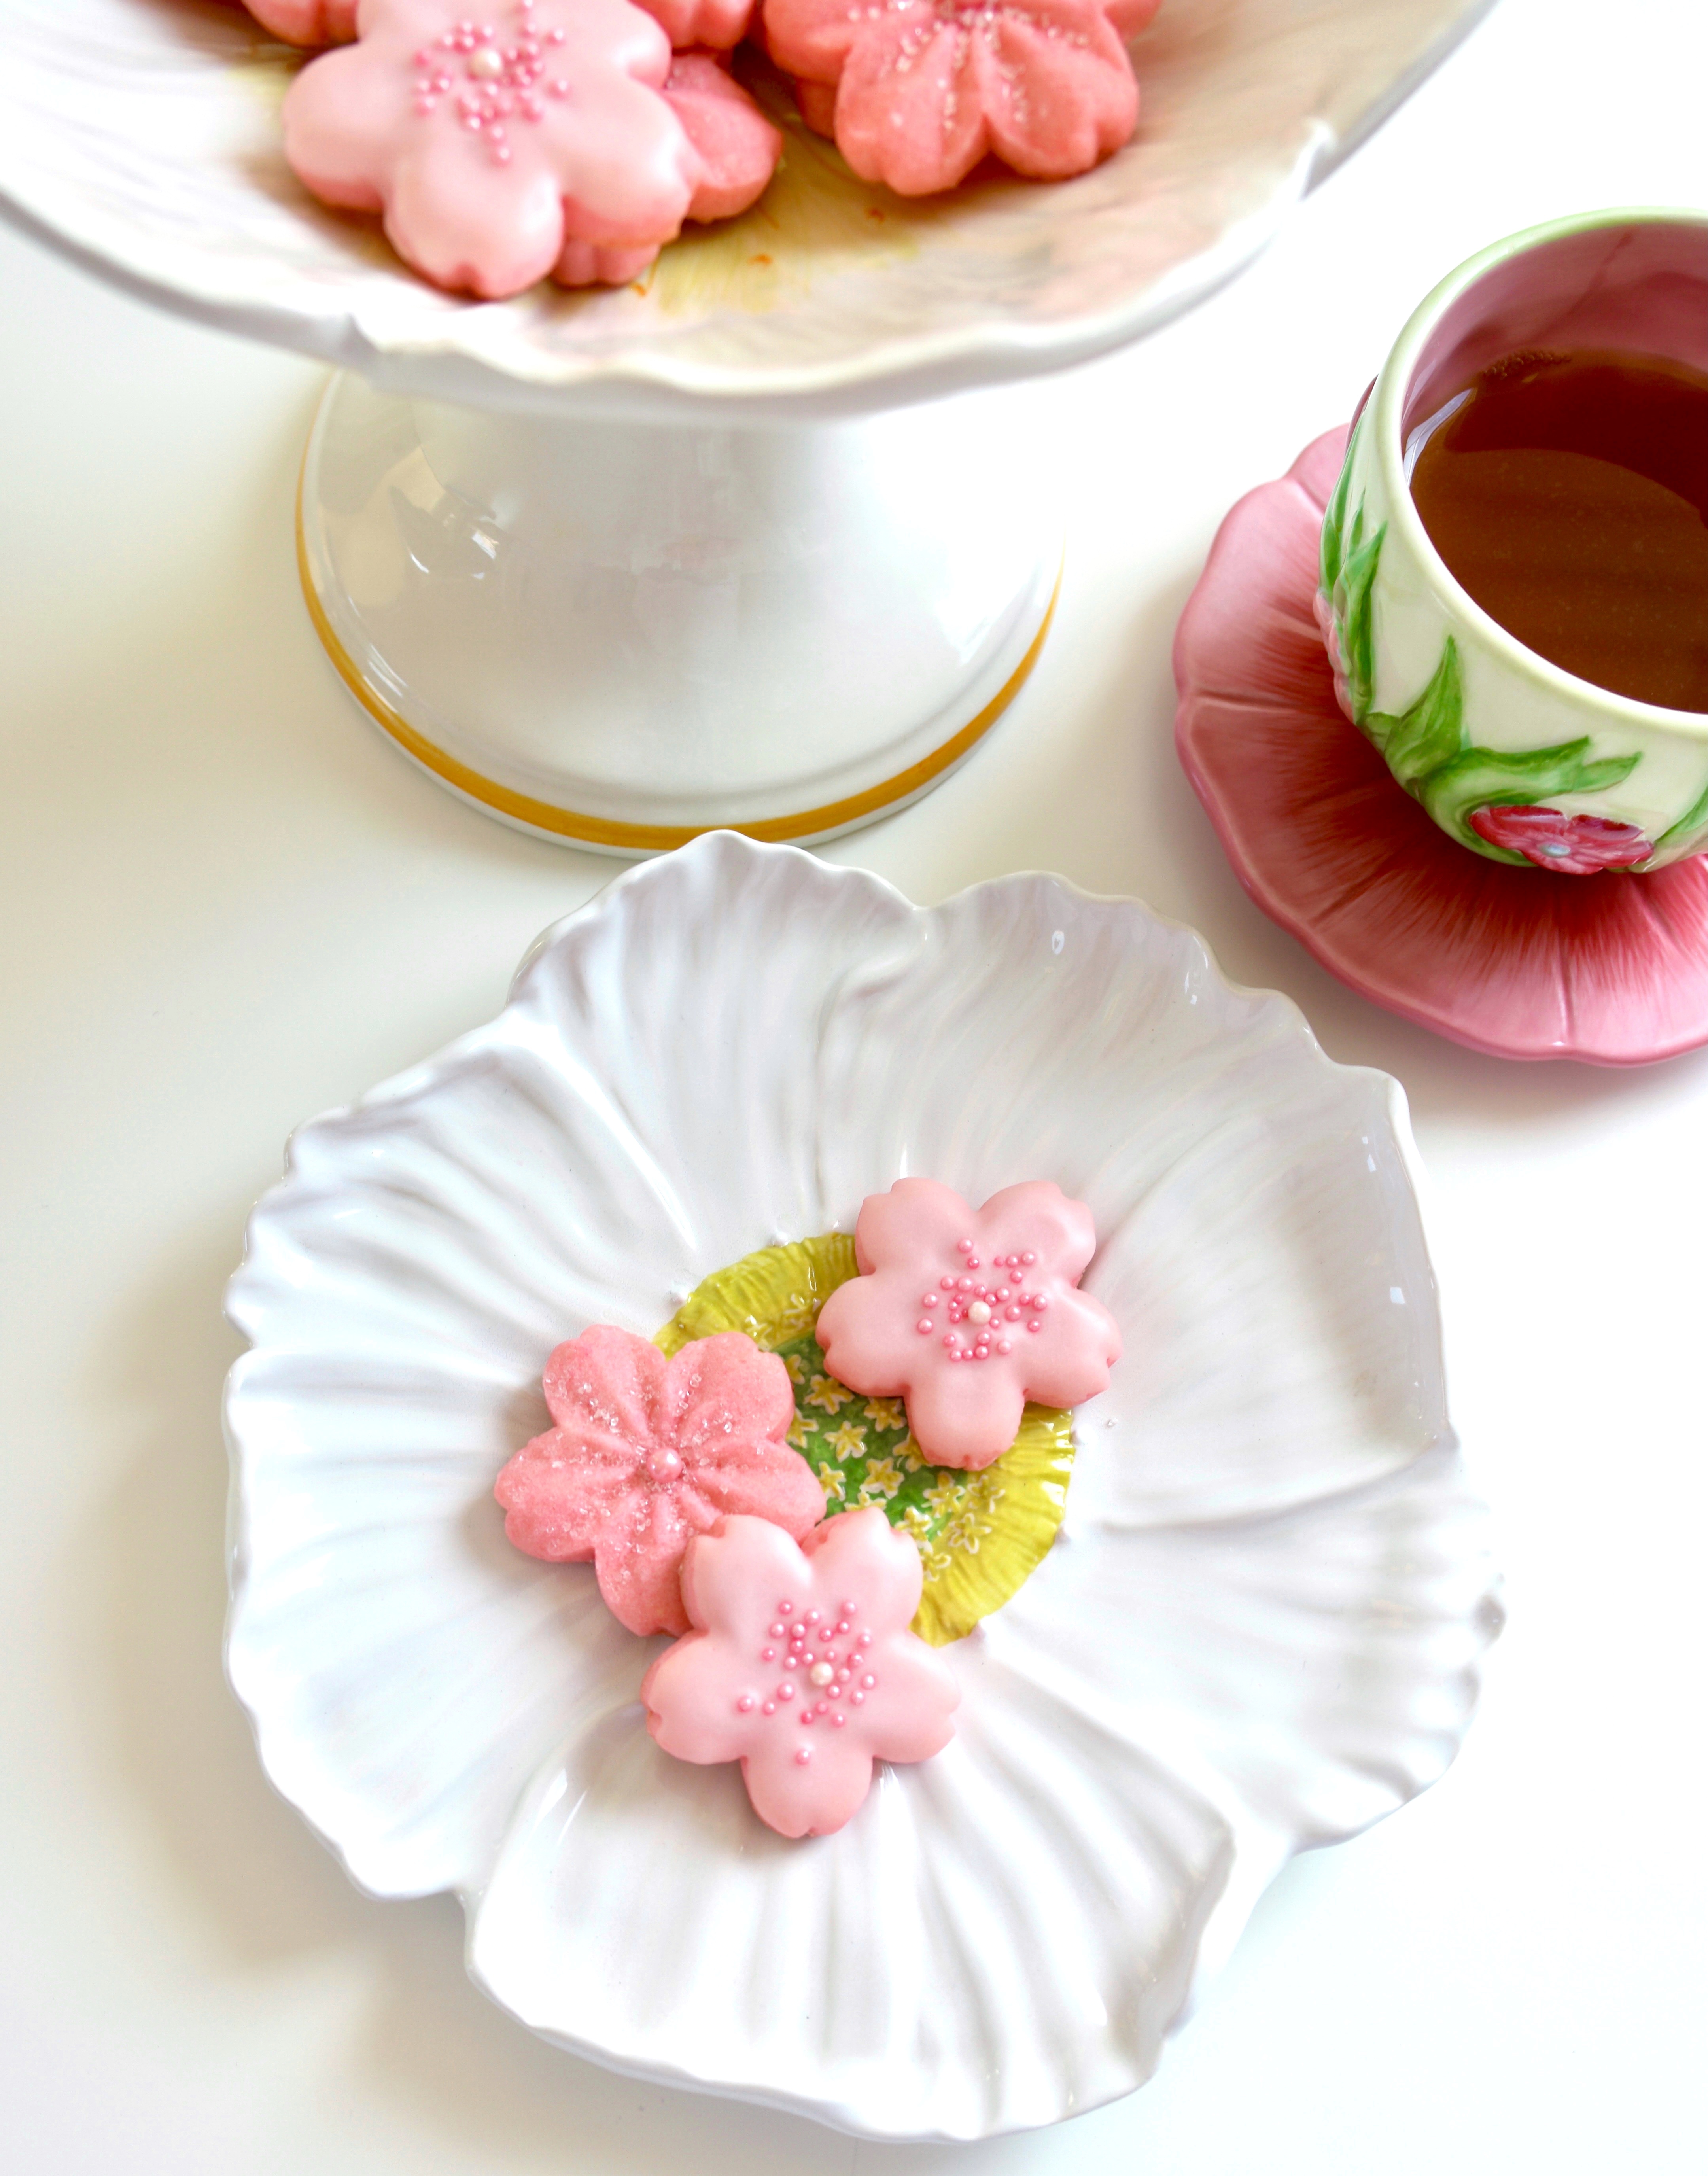
cherry blossom cookies

Each spring, I look forward to the sight and fragrance of beautiful botanical blooms, especially cherry blossoms. We often think of cherry blossoms as something unique to Washington D.C. or Japan, but cherry blossoms can be found in many regions of the United States. Georgia has many thousands of the beautiful pink trees. They can also be found in my home state, California. Here in California we also have many other types of beautiful blossoming fruit trees.

Inspired by the beautiful pink blossoms, I baked some cherry blossom cookies. There are many varieties of the blossoming pink trees. The Yoshino variety that we love to admire is not the same as the trees that produce cherries that we typically eat, but I decided to make the cookies cherry flavor. Cherry extract is more accessible, but it’s also possible to make the cookies sakura blossom flavor if you prefer. You can purchase culinary sakura blossoms or sakura powder and flavor the cookies with it.

These perfectly pretty, pink cookies are easy to make and fun to decorate. You can sprinkle sparkling sugar on them before baking and call it a day or you can make some pink cherry icing and add sugar pearls or sprinkles. Either way, they look beautiful and taste delicious!


Cherry Blossom Cookies

by Mari Vasseur
Pink cherry flavored sugar cookies with cherry icing
Course Brunch, Dessert
Servings 6 dozen

Ingredients
  

Cherry Blossom Cookies

  • 1 cup (227g) unsalted butter, softened
  • 6 tablespoons (3 oz / 85g) cream cheese, softened
  • ¾ cup (150g) sugar
  • ¼ teaspoon fine sea salt
  • 1 large egg
  • 1 teaspoon pure cherry extract or natural cherry flavoring *see note below
  • â…› teaspoon pure almond extract
  • 3 cups (383g) all purpose flour, sifted
  • Pink gel food color **see note below

Cherry Icing

  • 1 cup (120g) powdered sugar
  • 1 pinch fine sea salt
  • 4-5 tablespoons (59-67ml) whole milk
  • ½ teaspoon pure cherry extract or natural cherry flavoring
  • Pink gel food color

Optional Cookie Decorations

  • White sparkling sugar
  • Pink sugar pearls
  • Pink nonpareils

Instructions
 

Cherry Blossom Cookies

  • In a large bowl, beat the butter and cream cheese together with an electric mixer on medium speed, just until smooth and well blended.
  • Add the sugar and salt. Beat on medium speed until pale and fluffy. Mix in the egg, then the extracts until incorporated.
  • On low speed, mix in the flour in two additions, just until combined.
  • Mix in the food coloring, a tiny bit at a time, until the desired shade is achieved.
  • Divide the dough into two disks. Wrap them in plastic wrap and refrigerate until firm, about 2 hours or up to overnight.
  • Preheat the oven to 375ºF (190ºC). Line two large cookie sheets with parchment paper.
  • On a lightly floured surface, roll the dough to 1/8" thickness. Cut out cookies with a 2-inch blossom cutter..***
  • Place the cookies about 2 inches apart onto the prepared baking sheets. Sprinkle with sparkling sugar if using.
  • Bake for 7-9 minutes until the bottom edges are lightly browned. Remove from the oven and transfer the cookies to a cooling rack.
  • Cool completely then ice with cherry icing, if desired. Decorate with sugar pearls or sprinkles before the icing sets.

Cherry Icing

  • In a small bowl, whisk together the powdered sugar, salt, 3 tablespoons (45ml) of milk and the cherry extract. Add additional milk until the desired consistency is reached. Whisk together until smooth.
  • Mix in pink gel food color, a tiny bit at a time, until the desired shade is achieved.

Notes

*Do not use imitation cherry flavoring or extract. Imitation extracts may make your cookies taste medicinal. 
** I used Wilton gel food color in shade rose. Click here to find it. 
*** Use your favorite blossom cookie cutter or click here to find the blossom cutters I used.
Keyword cherry, cherry blossom, cookies

Marshmallow Mudslide Cookies

marshmallow mudslide cookies

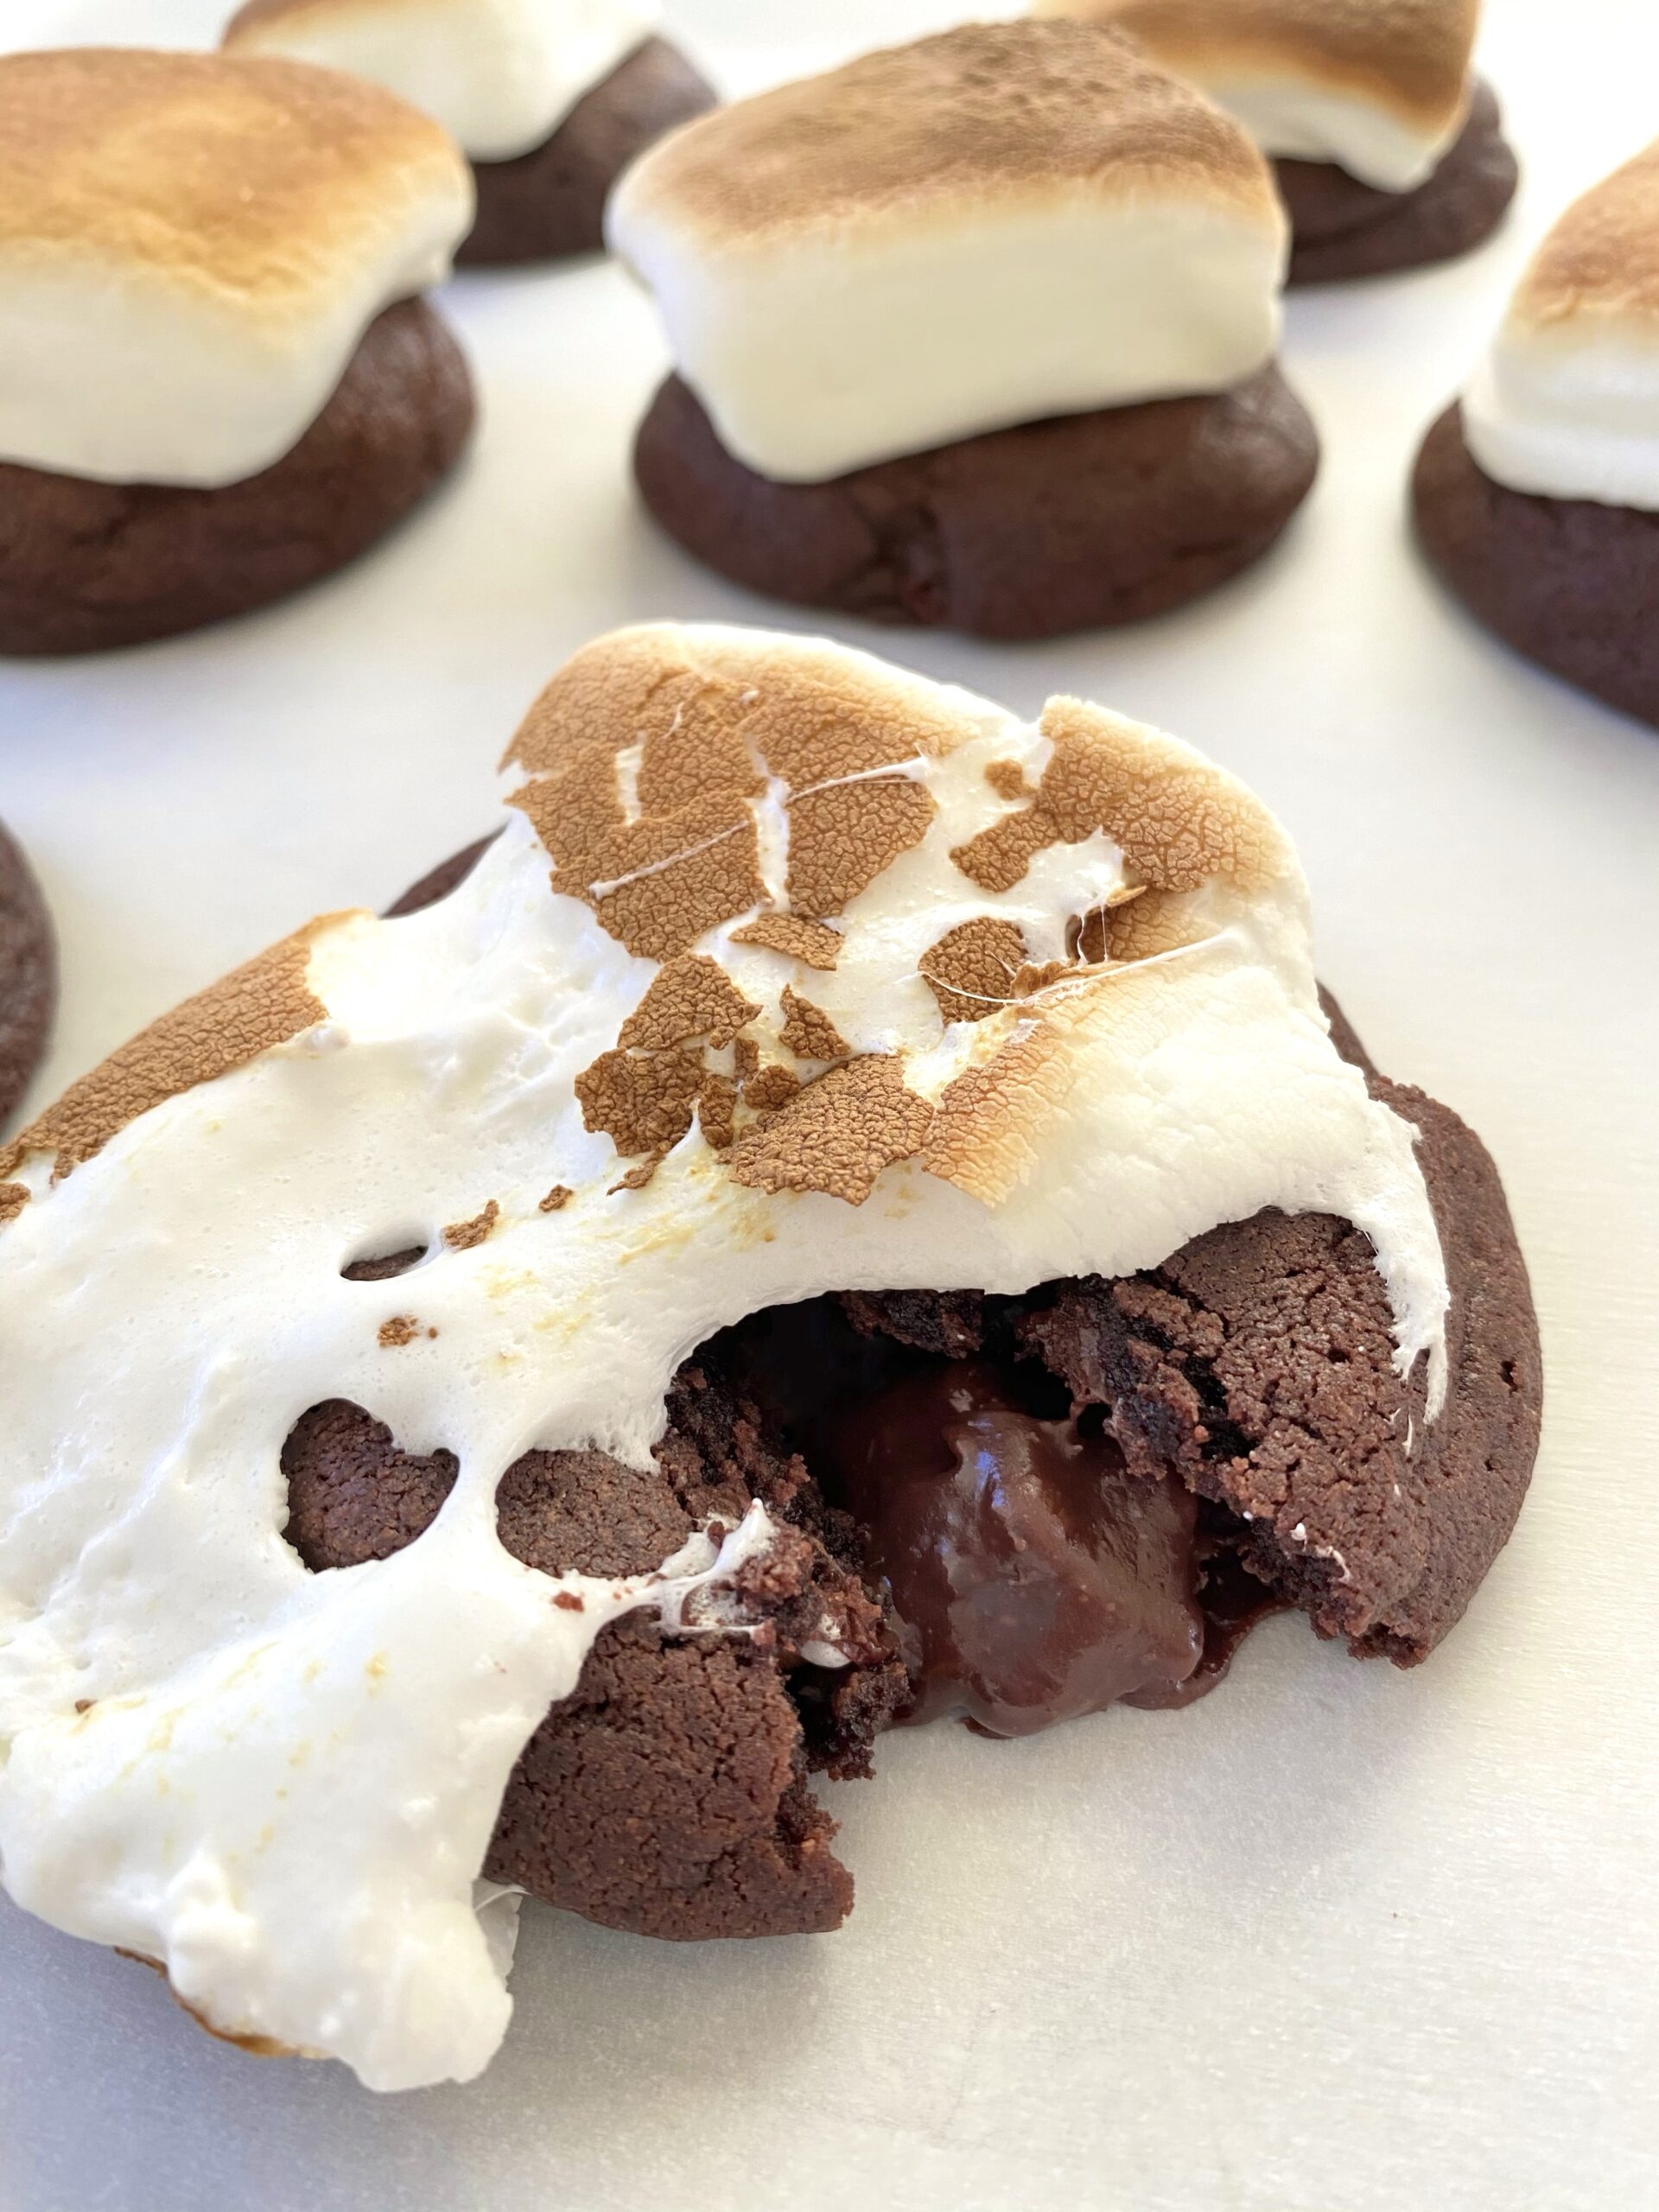
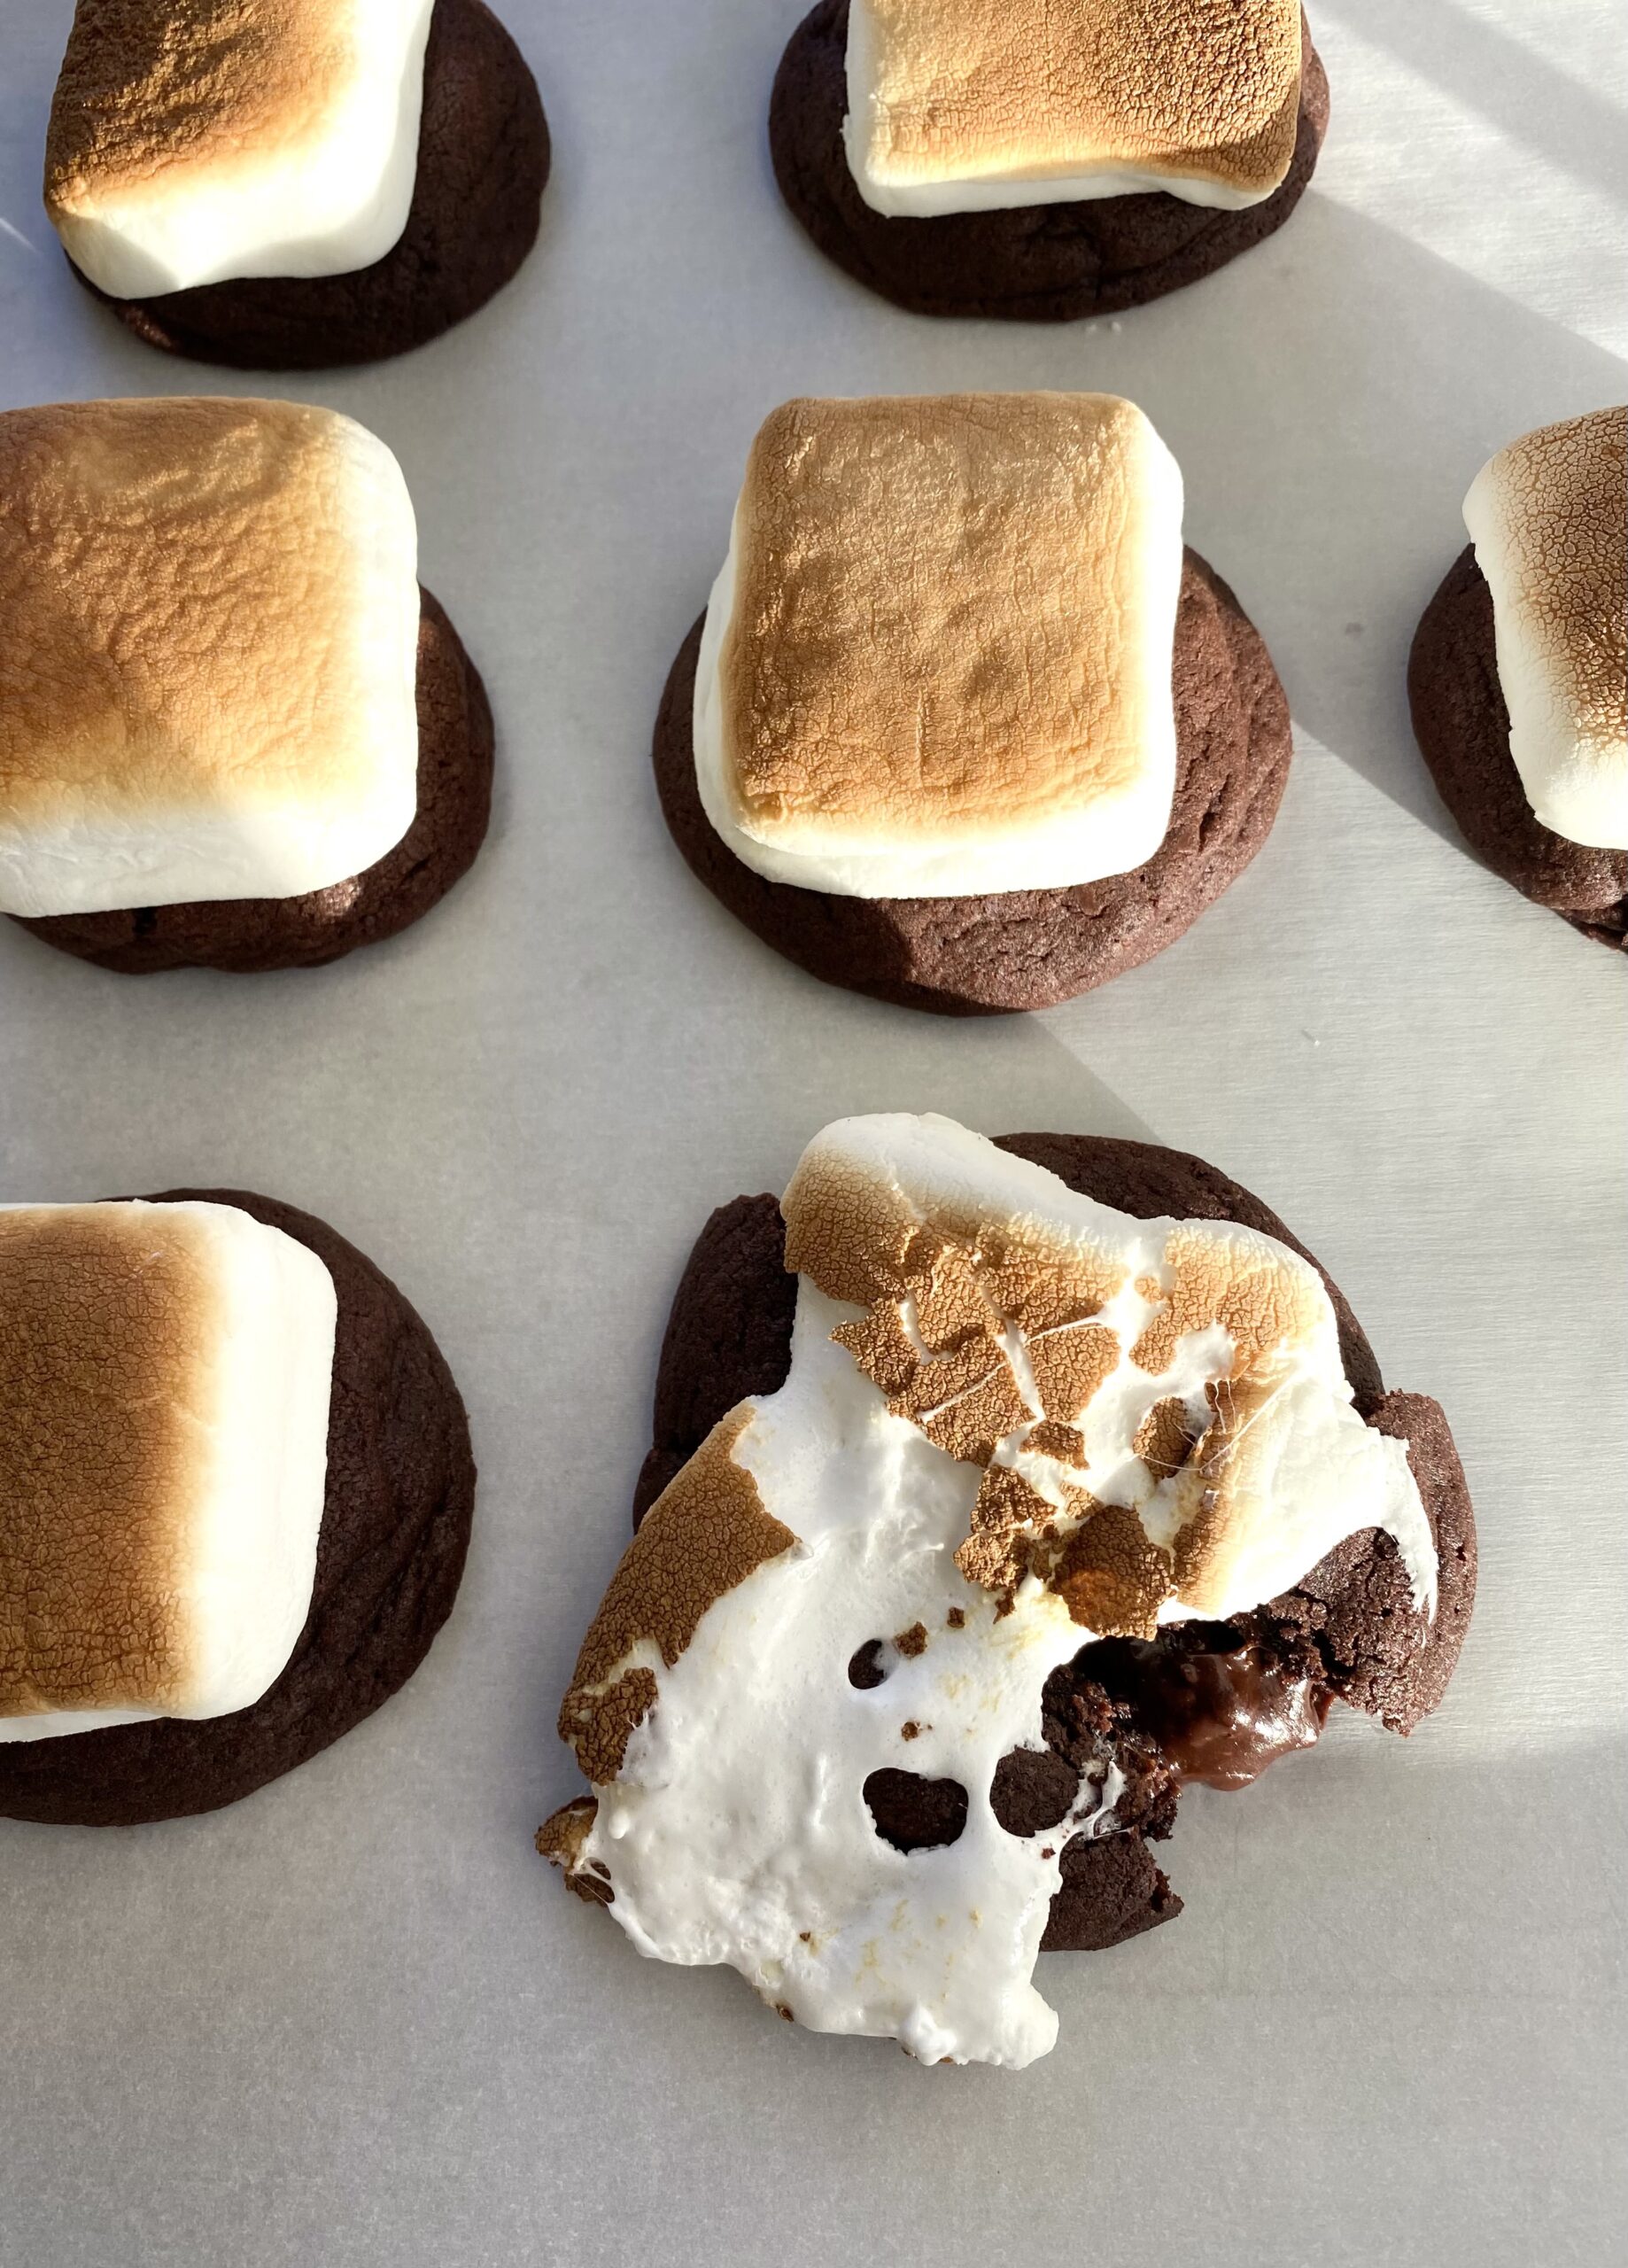
Have you ever had mudslide cake? It’s a deliciously messy chocolate cake with chocolate frosting and marshmallows, also known as Mississippi mud cake. I saw one covered in a layer of marshmallow fluff and it made its way into my dreams. I woke up with the inspiration to make a cookie version of the gooey mudslide cake.

I saw a few mudslide cookie recipes out there that used standard size marshmallows and chocolate chips mixed into the cookie dough. If you’ve ever baked with marshmallows, you know that they nearly disappear during the baking process. Chocolate chips melt beautifully into little pools of chocolate, but then harden once cooled to room temperature. I happily volunteered to address these challenges! After some trial and error, I created a satisfying cookie with plenty of gooey marshmallow goodness and a rich fudge filling that stays soft at room temperature. Dreams do come true!

marshmallow mudslide cookies


Marshmallow Mudslide Cookies

by Mari Vasseur
Chocolate fudge-filled cookies topped with toasted marshmallows
Course Dessert
Servings 22 cookies

Ingredients
  

Fudge filling

  • 1 â…“ cup (227g) semisweet chocolate chips
  • 1 cup (310g) sweetened condensed milk
  • â…” cup (74g) chopped toasted pecans or walnuts optional

Cookies

  • 2 ¼ cups (287g) all purpose flour, sifted
  • ½ cup (45g) unsweetened Dutch Process cocoa powder, sifted preferably dark
  • ½ teaspoon baking powder
  • ½ teaspoon baking soda
  • ¼ teaspoon fine sea salt
  • 1 cup (227g) unsalted butter, softened
  • 2 large eggs
  • 1 teaspoon pure vanilla extract
  • 1 cup (200g) granulated sugar
  • ¼ cup (50g) packed brown sugar
  • 22-24 S'mores marshmallows or jumbo marshmallows* I used Kraft Jet-Puffed S'moreMallows

Instructions
 

Fudge filling

  • Melt the chocolate chips and sweetened condensed milk together in a double boiler or in the microwave in a medium-sized microwave safe bowl.** Stir gently until smooth.
  • Stir in the chopped nuts if using. Set aside to cool to room temperature.

Cookies

  • Preheat the oven to 350º (180ºC). Line 2 large cookie sheets with parchment paper.
  • In a medium-sized bowl, sift together the flour, cocoa powder, baking powder, baking soda, and salt until well blended.
  • In a large bowl, beat the butter, granulated sugar and brown sugar with an electric mixer at medium speed, until pale and fluffy. Mix in the eggs and the vanilla in 3 separate additions, making sure each addition is incorporated before adding the next. On low speed, mix in the flour mixture in 2 additions, just until combined.
  • Roll the fudge filling into 1-tablespoon-sized balls. Roll the cookie dough into 2-tablespoon-sized balls then flatten them into disks. Place a ball of fudge filling in the middle of each disk. Wrap the cookie dough around the ball of filling, sealing it completely.
  • Place the cookies about 2 inches apart onto the prepared cookie sheets. Bake until the tops of the cookies are set, about 9-11 minutes. Remove from oven.
  • Place a marshmallow on top of each cookie. Use a kitchen torch to toast the marshmallows or toast them in the broiler: Turn on the broiler. Transfer the cookies to an aluminum foil-lined cookie sheet. Broil the cookies until the marshmallows are toasted. This takes about 1 minute. WARNING: Use extreme caution and watch the cookies carefully when broiling. They can go from done to burnt in the blink of an eye!

Notes

*I used Kraft Jet-Puffed S'moreMallows, but if you're unable to find them, use jumbo marshmallows. Cut them in half with kitchen shears. Place them on the cookies cut side down.
**To melt the fudge filling in microwave, heat for 20 seconds. Stir, then microwave for 10 second bursts, stirring until melted and smooth.
Keyword chocolate, cookies

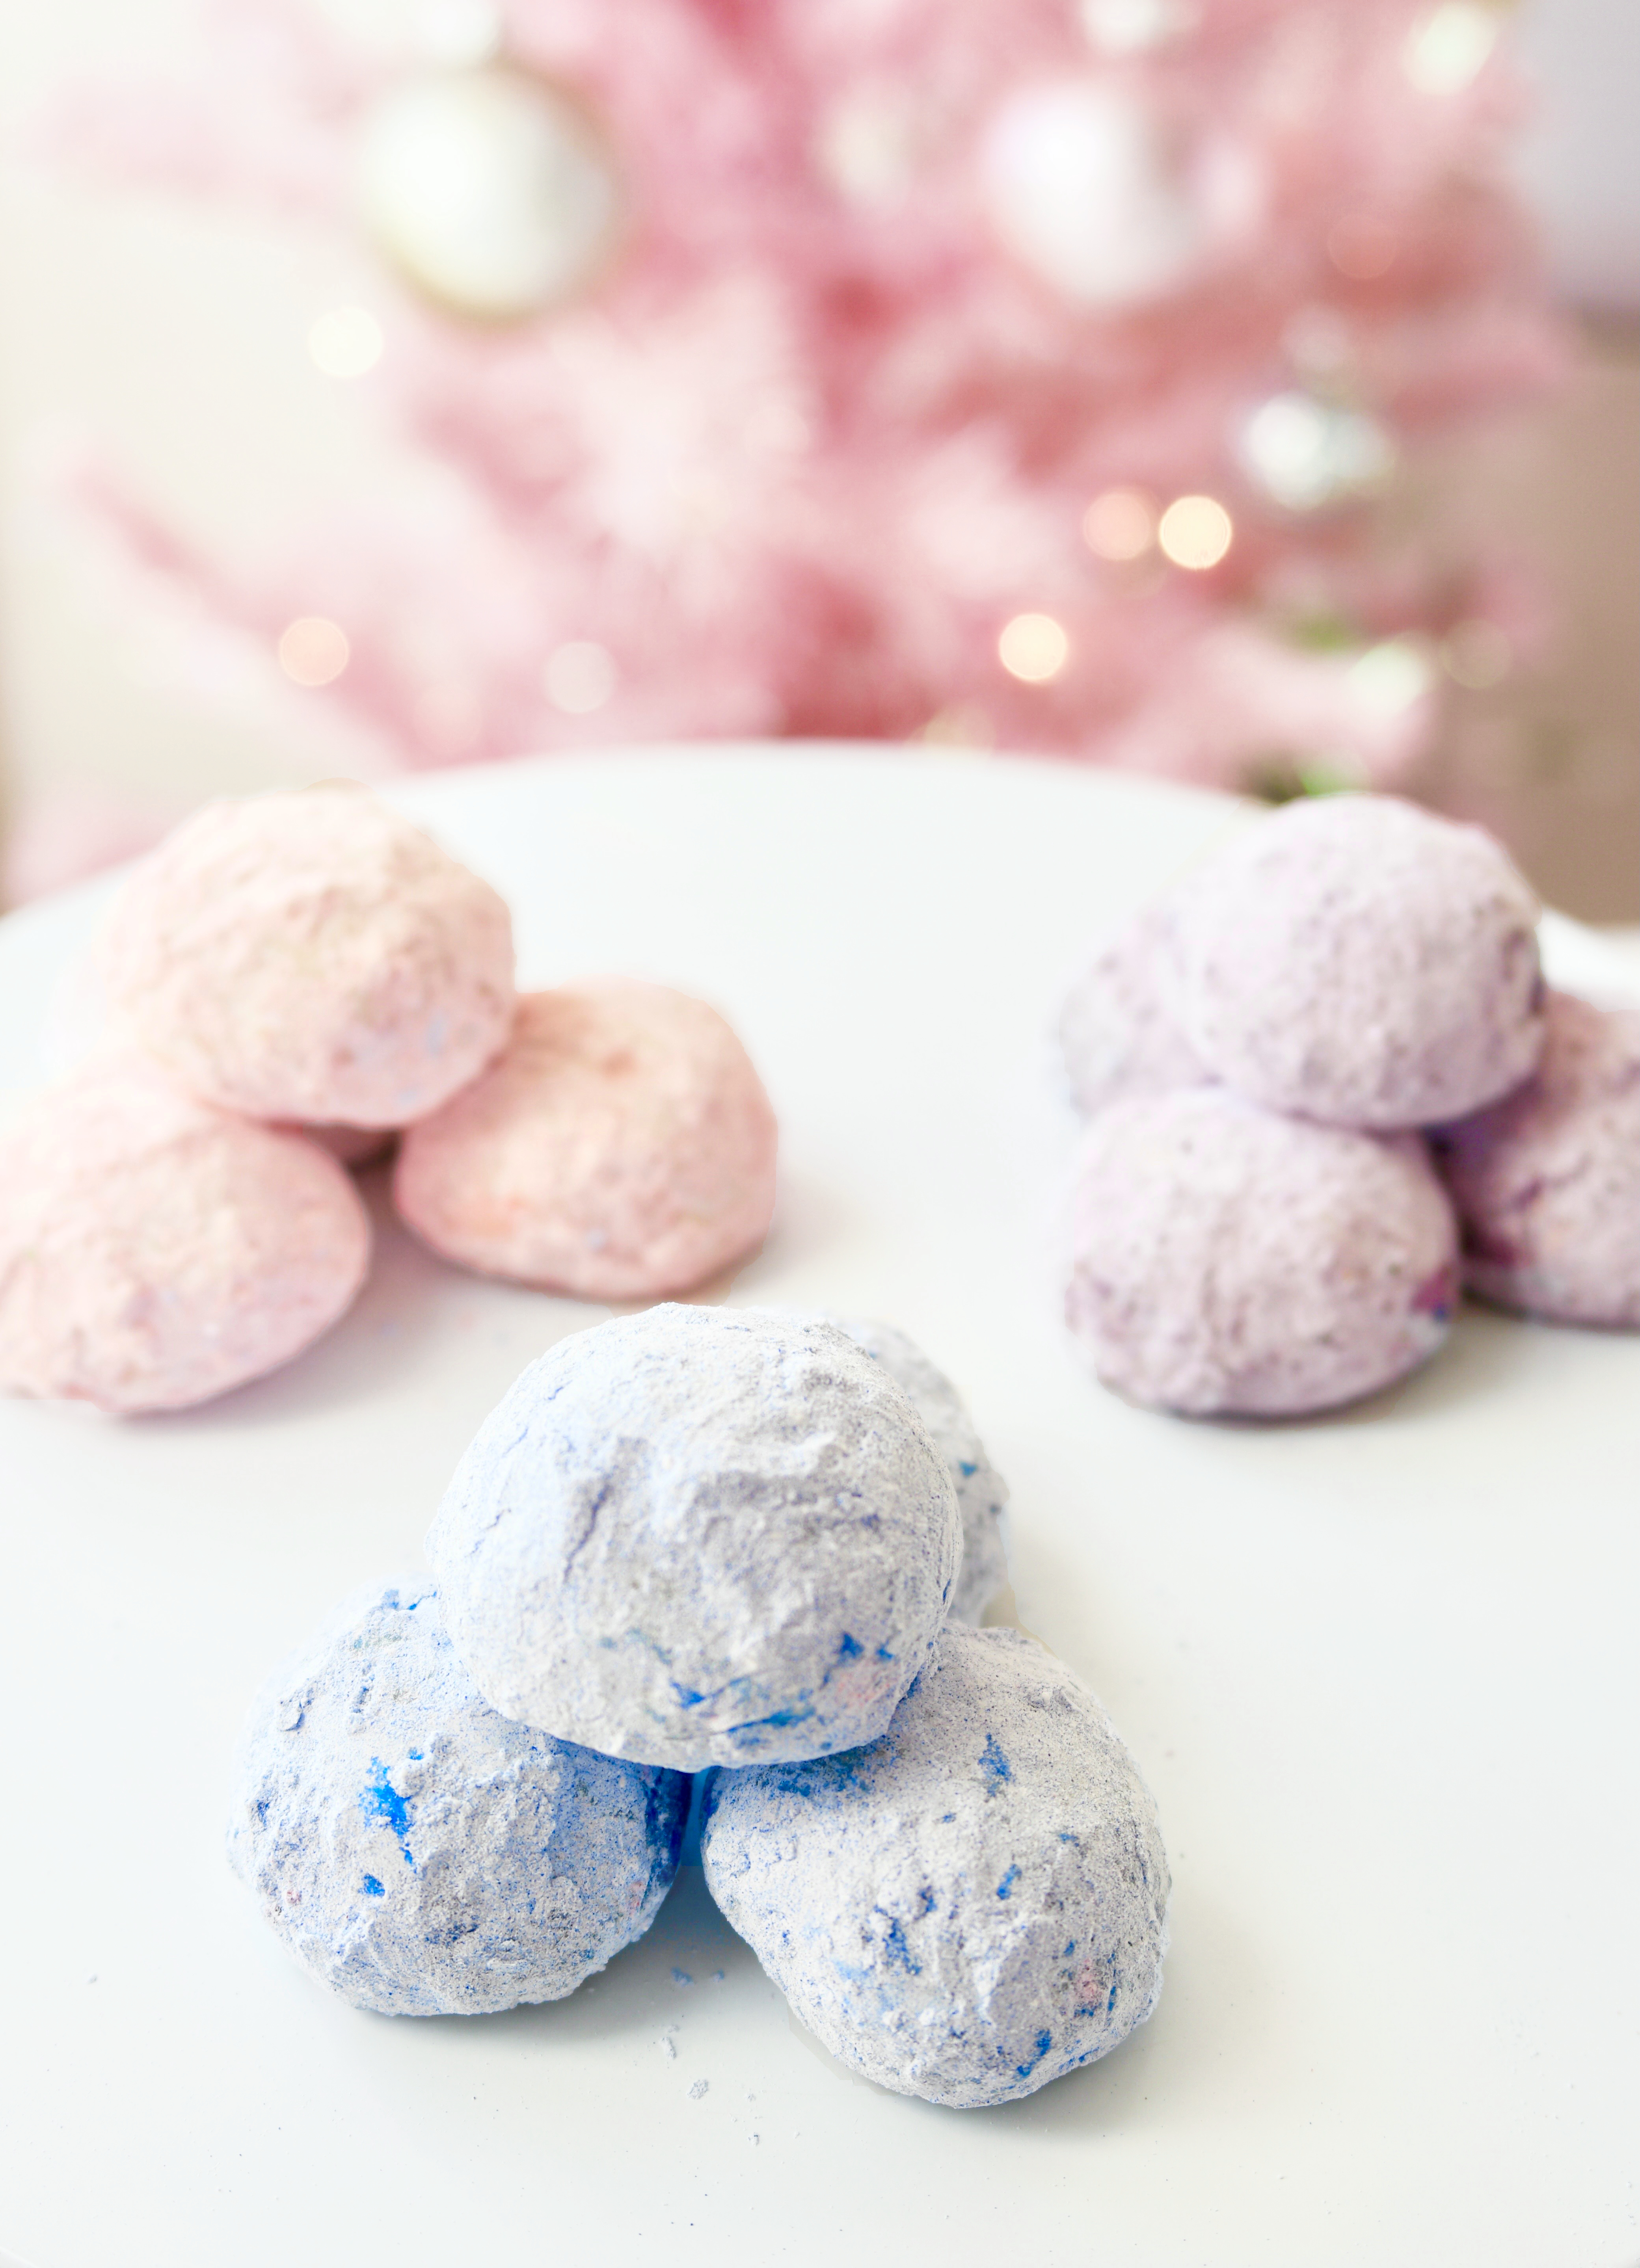
Pastel Snowball Cookies

pastel snowball cookies

This delightful melt-in-your-mouth cookie recipe has been in my family for decades. We call them Snowballs, but they’re also known as Mexican Wedding Cakes or Greek Kourabiedes. I make them every year for Christmas, but they would also be perfect for Easter, Mother’s Day, birthday parties, tea parties, weddings, bridal showers, and baby showers.

Pecans are my favorite nuts to use in this recipe, but you can use almost any nuts you have on hand. The original snowy white version is a classic but you can take them up a notch with pretty pastels and fruit flavors. You can use crushed, freeze-dried fruit for color and subtle flavor. Spirulina is a nutritious, vibrant powder you can use to make beautiful blue cookies. You can also dress up your snowballs with edible glitter or luster dust used for cake decorating. There are endless ways to be creative with these cute cookies!


Pastel Snowball Cookies

by Mari Vasseur
Melt-in-your-mouth shortbread cookie balls covered in pastel powdered sugar
Course Dessert
Servings 36 cookies

Ingredients
  

Cookies

  • 1 cup (227g) unsalted butter, softened
  • 1 cup (120g) powdered sugar, sifted and divided plus more for desired pastel powdered sugar color
  • 1 teaspoon vanilla extract
  • ¼ teaspoon fine sea salt
  • 2 cups (255g) all purpose flour, sifted
  • ½ cup (64g) finely chopped pecans

Pink powdered sugar

  • â…“ cup (40g) powdered sugar, sifted
  • ½ cup (14g) freeze-dried strawberries or raspberries see note below*

Blue powered sugar

  • â…“ cup (40g) powdered sugar, sifted
  • 1 ½ teaspoons blue spirulina powder

Lavender powered sugar

  • â…“ cup (40g) powdered sugar, sifted
  • ½ cup (14g) freeze-dried blueberries see note below*
  • ¼ teaspoon violet edible petal dust optional

Instructions
 

Cookies

  • Preheat the oven to 325ºF (165ºC). Line two cookie sheets with parchment paper.
  • In a large bowl, beat the butter, with an electric mixer at medium speed, until smooth and creamy. Add 1/2 cup (60g)of powdered sugar, the vanilla and salt. Beat until pale and fluffy.
  • In a separate medium-sized bowl, combine the flour and pecans. Gradually add the flour and pecan mixture to the butter mixture, beating on low speed until combined.
  • Shape the dough into scant 1-inch balls. Place the balls about 2 inches apart onto the prepared cookie sheets. Bake until light golden brown, about 17-20 minutes.
  • Place the remaining 1/2 cup (60g) of powdered sugar in a plastic bag. With a spatula, transfer three warm cookies into the bag. Shake gently to coat the cookies with powdered sugar. Transfer them to a cooling rack. Repeat with the remaining cookies.
  • Cool the cookies completely then proceed to the instructions for pastel powdered sugar, depending on which color you have selected.

Pink powdered sugar

  • Process the freeze-dried strawberries or raspberries into a fine powder in a mini food processor.
  • Whisk the freeze-dried berry powder with 1/3 cup (40g) powered sugar together in a small bowl.
  • Transfer the powered sugar mixture to a plastic bag. Place three cookies in the bag and shake gently until coated with the powdered sugar mixture. Transfer the cookies back to the rack and repeat with remaining cookies.

Blue powered sugar

  • Whisk 1/3 cup (40g) powdered sugar and the spriulina powder in a small bowl.
  • Transfer the powered sugar mixture to a plastic bag. Place three cookies in the bag and shake gently until coated with the powdered sugar mixture. Transfer the cookies back to the rack and repeat with the remaining cookies.

Lavender powered sugar

  • Process the freeze-dried blueberries into a fine powder in a mini food processor.
  • Whisk the freeze-dried blueberry powder with 1/3 cup (40g) powered sugar together in a small bowl. Whisk in petal dust for a more vibrant color, if desired.
  • Transfer the powered sugar mixture to a plastic bag. Place three cookies in the bag and shake gently until coated with the powdered sugar mixture. Transfer the cookies back to the rack and repeat with the remaining cookies.

Notes

*The ratios for the pastel powered sugar are approximate. Freeze-dried fruit varies in color. Add more or less to achieve your desired shade.
Keyword cookies