Glazed Lemon Muffins

Glazed Lemon Muffins

However your day is going today, it’s about to get better. I can confidently say these lemon muffins are some of the best you will ever taste. Follow the recipe exactly, weigh your ingredients and you’ll be enjoying these soft, tender muffins in no time. These delightful muffins are perfect for breakfast, brunch or an anytime snack. I love enjoying one with a cup of strawberry green tea or chamomile tea.

Glazed Lemon Muffins

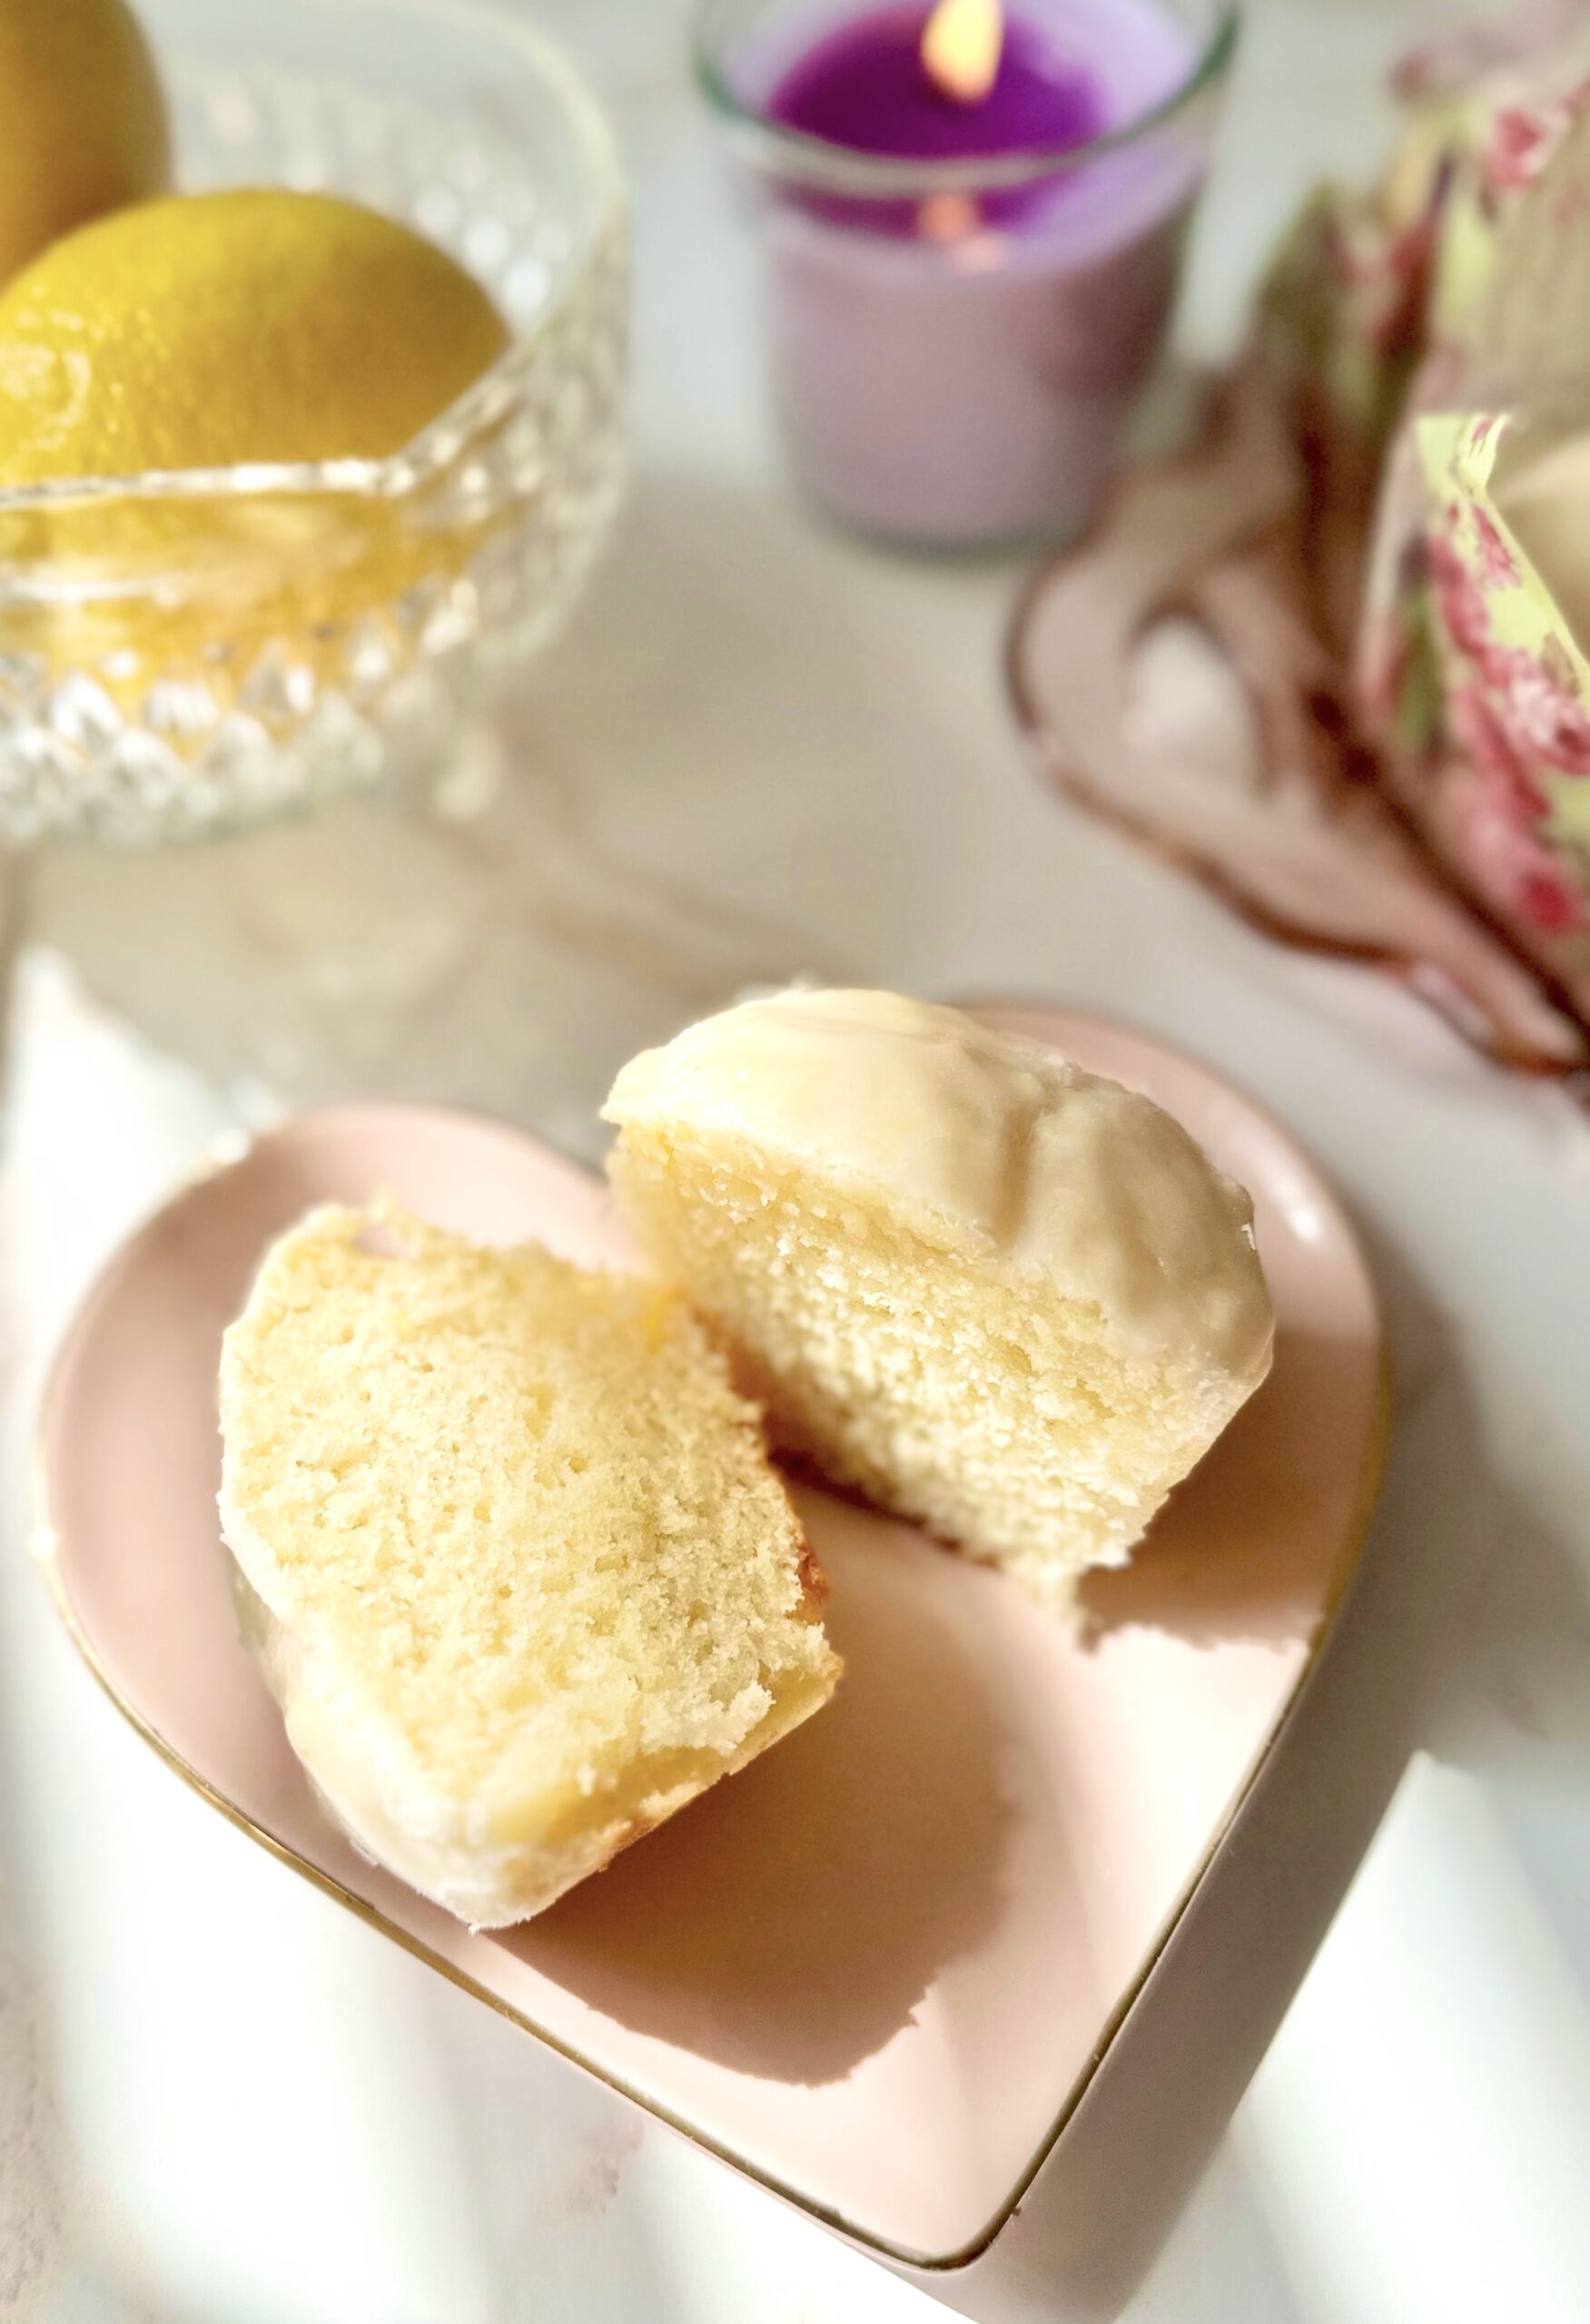
Soft, tender lemon muffins glazed with lemon icing
Course Breakfast, Brunch
Servings 12 muffins

Ingredients
  

Muffins

  • 2 ¼ cups (288g) all purpose flour, sifted
  • 2 teaspoons baking powder
  • ½ teaspoon baking soda
  • ½ teaspoon fine sea salt
  • ¾ cup (170g) unsalted butter, softened
  • 1 cup (198g) sugar
  • Zest of 2 medium lemons
  • 2 large eggs, room temperature
  • ½ teaspoon pure vanilla extract
  • ½ teaspoon pure lemon extract
  • 1 cup (8 oz or 227g) sour cream, room temperature

Icing

  • 1 cup (120g) powdered sugar, sifted
  • 1 tablespoon (14g) melted butter
  • 2-3 tablespoons (15-45ml) fresh lemon juice

Instructions
 

Muffins

  • Preheat the oven to 375ºF (190ºC). Line a 12-serving muffin pan with tulip baking liners.* (You can also use standard muffin liners. They hold less batter so you may end up with a couple of extra muffins.)
  • In a medium-size bowl, whisk together the flour, baking powder, baking soda and salt until well combined.
  • In a large bowl, cream the butter, sugar and lemon zest, with an electric mixer, until light and fluffy. Add the eggs one at a time and beat until well incorporated. Add the extracts and beat until combined.
  • On low speed, mix in the flour mixture in two additions, alternating with half of sour cream after each addition. Mix just until combined. The batter will be thick.
  • Divide the batter evenly into muffin liners. (If using standard muffin liners, fill 3/4 full.) Bake at 375ºF (190ºC) for 5 minutes. Turn the oven heat down to 350ºF (180ºC) and continue baking the muffins until a toothpick inserted into the centers comes out clean, about 12-16 more minutes. Do not over bake.
  • Transfer the muffins to a cooling rack to cool completely. Brush icing onto the muffin tops with a small pastry brush.

Icing

  • Whisk the powdered sugar, melted butter, and 1 tablespoon (15ml) of lemon juice together until smooth. Add additional lemon juice until your desired consistency is reached.

Notes

*To find  tulip muffin liners, click here.
To find floral tulip muffin liners, click here.
Keyword lemon, muffins

Lemon Scones

Lemon Scones

Yellow is the color of happiness and sunshine. These adorable Lemon Scones will bring you a burst of lemony brightness even on the grayest day. The pretty, vibrant yellow sparkling sugar adds a pleasant crunch to the tops. It’s a nice contrast to the soft, tender interior of the scones. These little gems would shine on any breakfast or brunch table. I served them with blueberry jam and green tea, which was so delightful, I’m still smiling.


Lemon Scones

by Mari Vasseur
Course Breakfast, Brunch
Servings 12 scones

Ingredients
  

Lemon Scones

  • 1 ¾ cups (223g) all purpose flour, sifted
  • 1 tablespoon baking powder
  • ½ teaspoon fine sea salt
  • ¼ cup (50g) sugar
  • 7 tablespoons (99g) cold, unsalted butter, cubed
  • Zest of 2 medium lemons
  • â…” cup (156ml) cold heavy cream plus more for tops
  • 2 tablespoons (30ml) lemon juice
  • Yellow sparkling sugar*

Icing

  • â…“ cup (40g) powdered sugar, sifted
  • 1 teaspoon heavy cream
  • 1-2 teaspoons lemon juice

Instructions
 

Lemon Scones

  • Preheat the oven to 375ºF (190ºC). Line a large baking sheet with parchment paper.
  • In a large bowl, whisk together the flour, baking powder, salt and sugar until well blended
  • Work the butter and lemon zest into the flour mixture with your fingertips or with a pastry blender until pea size chunks form.
  • Stir in the heavy cream and lemon juice until a shaggy dough is formed. If your dough seems too dry, you can add 1-2 more teaspoons of heavy cream.
  • Turn the dough out onto a lightly floured surface. Fold the dough over onto itself a couple of times. Do not overwork the dough.
  • Pat or roll the dough into an 8-inch round, about 3/4-inch thick. Cut out rounds using a 2" or 2 1/4" inch round cutter.**
  • Place the scones about 2 inches apart onto the prepared baking sheet. Brush the scones with heavy cream. Sprinkle generously with sparkling sugar.
  • Bake until the edges are golden brown, about 16-19 minutes.
  • Cool completely on a wire rack. Decorate with icing.

Icing

  • In a small bowl, whisk together the powdered sugar, heavy cream and enough lemon juice to form a stiff icing.
  • Transfer the icing to a piping bag or a plastic zip bag. Snip off the tip of the bag. Pipe lines in a spoke pattern onto the scones.

Notes

*To find the sparkling sugar I used, click here.
**To find the cutter I used, click here.
Keyword lemon, scones

Lemon Crinkle Cookies

Lemon Crinkle Cookies by Brownie Mischief
Click here to watch the video

Crinkle cookies, also known as crackle cookies, have been around for a very long time. The pretty, crispy, cracked exterior and the soft, moist interior are what we love about them! There’s definitely no shortage of recipes for crinkles out there, everything from chocolate to red velvet. I even saw an audacious cookie company selling lemon crinkles for twelve dollars each, more money than it will cost for this entire batch! So many of the recipes I tried were disappointing, especially the ones made with cake mix. So I created my own version which happened to go viral! Here’s to making sure delicious lemon crinkle cookies are available for all to enjoy.

This recipe requires a bit of chilling, which I know many people don’t like because they’re impatient. I happen to be one of those people. Old fashioned crinkle cookies require about 3 hours of chilling. My recipe has the addition of cornstarch, which helps prevent spreading and allows for a shorter chilling time. As an added bonus, cornstarch makes the cookies more tender. Win win!

Fresh lemon zest and lemon juice in these cookies is crucial to the best lemon flavor. A bit of pure lemon extract is added to enhance that flavor. Don’t be tempted to use imitation extracts. The flavor will disappoint you. I added two drops of lemon yellow food color, which made them so pretty they look like pure sunshine!


Lemon Crinkle Cookies

Lemon cookies with a crackled, crispy exterior and a soft, tender interior
Course Dessert
Servings 14 cookies

Ingredients
  

  • 1 ¾ cups (223g) all purpose flour, sifted
  • ¼ cup (28g) cornstarch
  • 1 teaspoon baking powder
  • ½ teaspoon fine sea salt
  • ¼ teaspoon baking soda
  • ½ cup (113g) unsalted butter, softened
  • 1 cup (200g) granulated sugar
  • Zest of 1 large lemon
  • 1 large egg
  • 2 tablespoons (30ml) fresh lemon juice
  • 1 teaspoon pure lemon extract
  • ½ teaspoon pure vanilla extract
  • 1-2 drops yellow gel food coloring (optional) *I used Americolor lemon yellow
  • ½ cup (60g) powdered sugar

Instructions
 

  • In a medium-sized bowl, whisk together the flour, cornstarch, baking powder, salt and baking soda until well blended.
  • In a large bowl, beat the butter, sugar and lemon zest together until pale and fluffy. Beat in the egg until well incorporated. Mix in the lemon juice, extracts and food coloring until well combined. Add the flour mixture and mix just until combined.
  • Refrigerate the cookie dough for 30 minutes to one hour.
  • Meanwhile, preheat the oven to 350ºF (180ºC). Line two large cookie sheets with parchment paper.
  • Roll the dough into balls, about 2 tablespoons each. I used a #30 portion scoop*. Roll the dough balls generously in powdered sugar.
  • Place the dough balls about 2 inches apart onto the prepared baking sheets.
  • Bake until the cookies are set, about 10-12 minutes. Let them cool on the cookie sheet for 1 minute then transfer to a cooling rack.

Notes

*To find Americolor lemon yellow gel food color, click here.
**To find a #30 cookie scoop, click here.
To find the striped wax paper pictured above, click here.