Pink Velvet Cookies

Pink Velvet Cookies

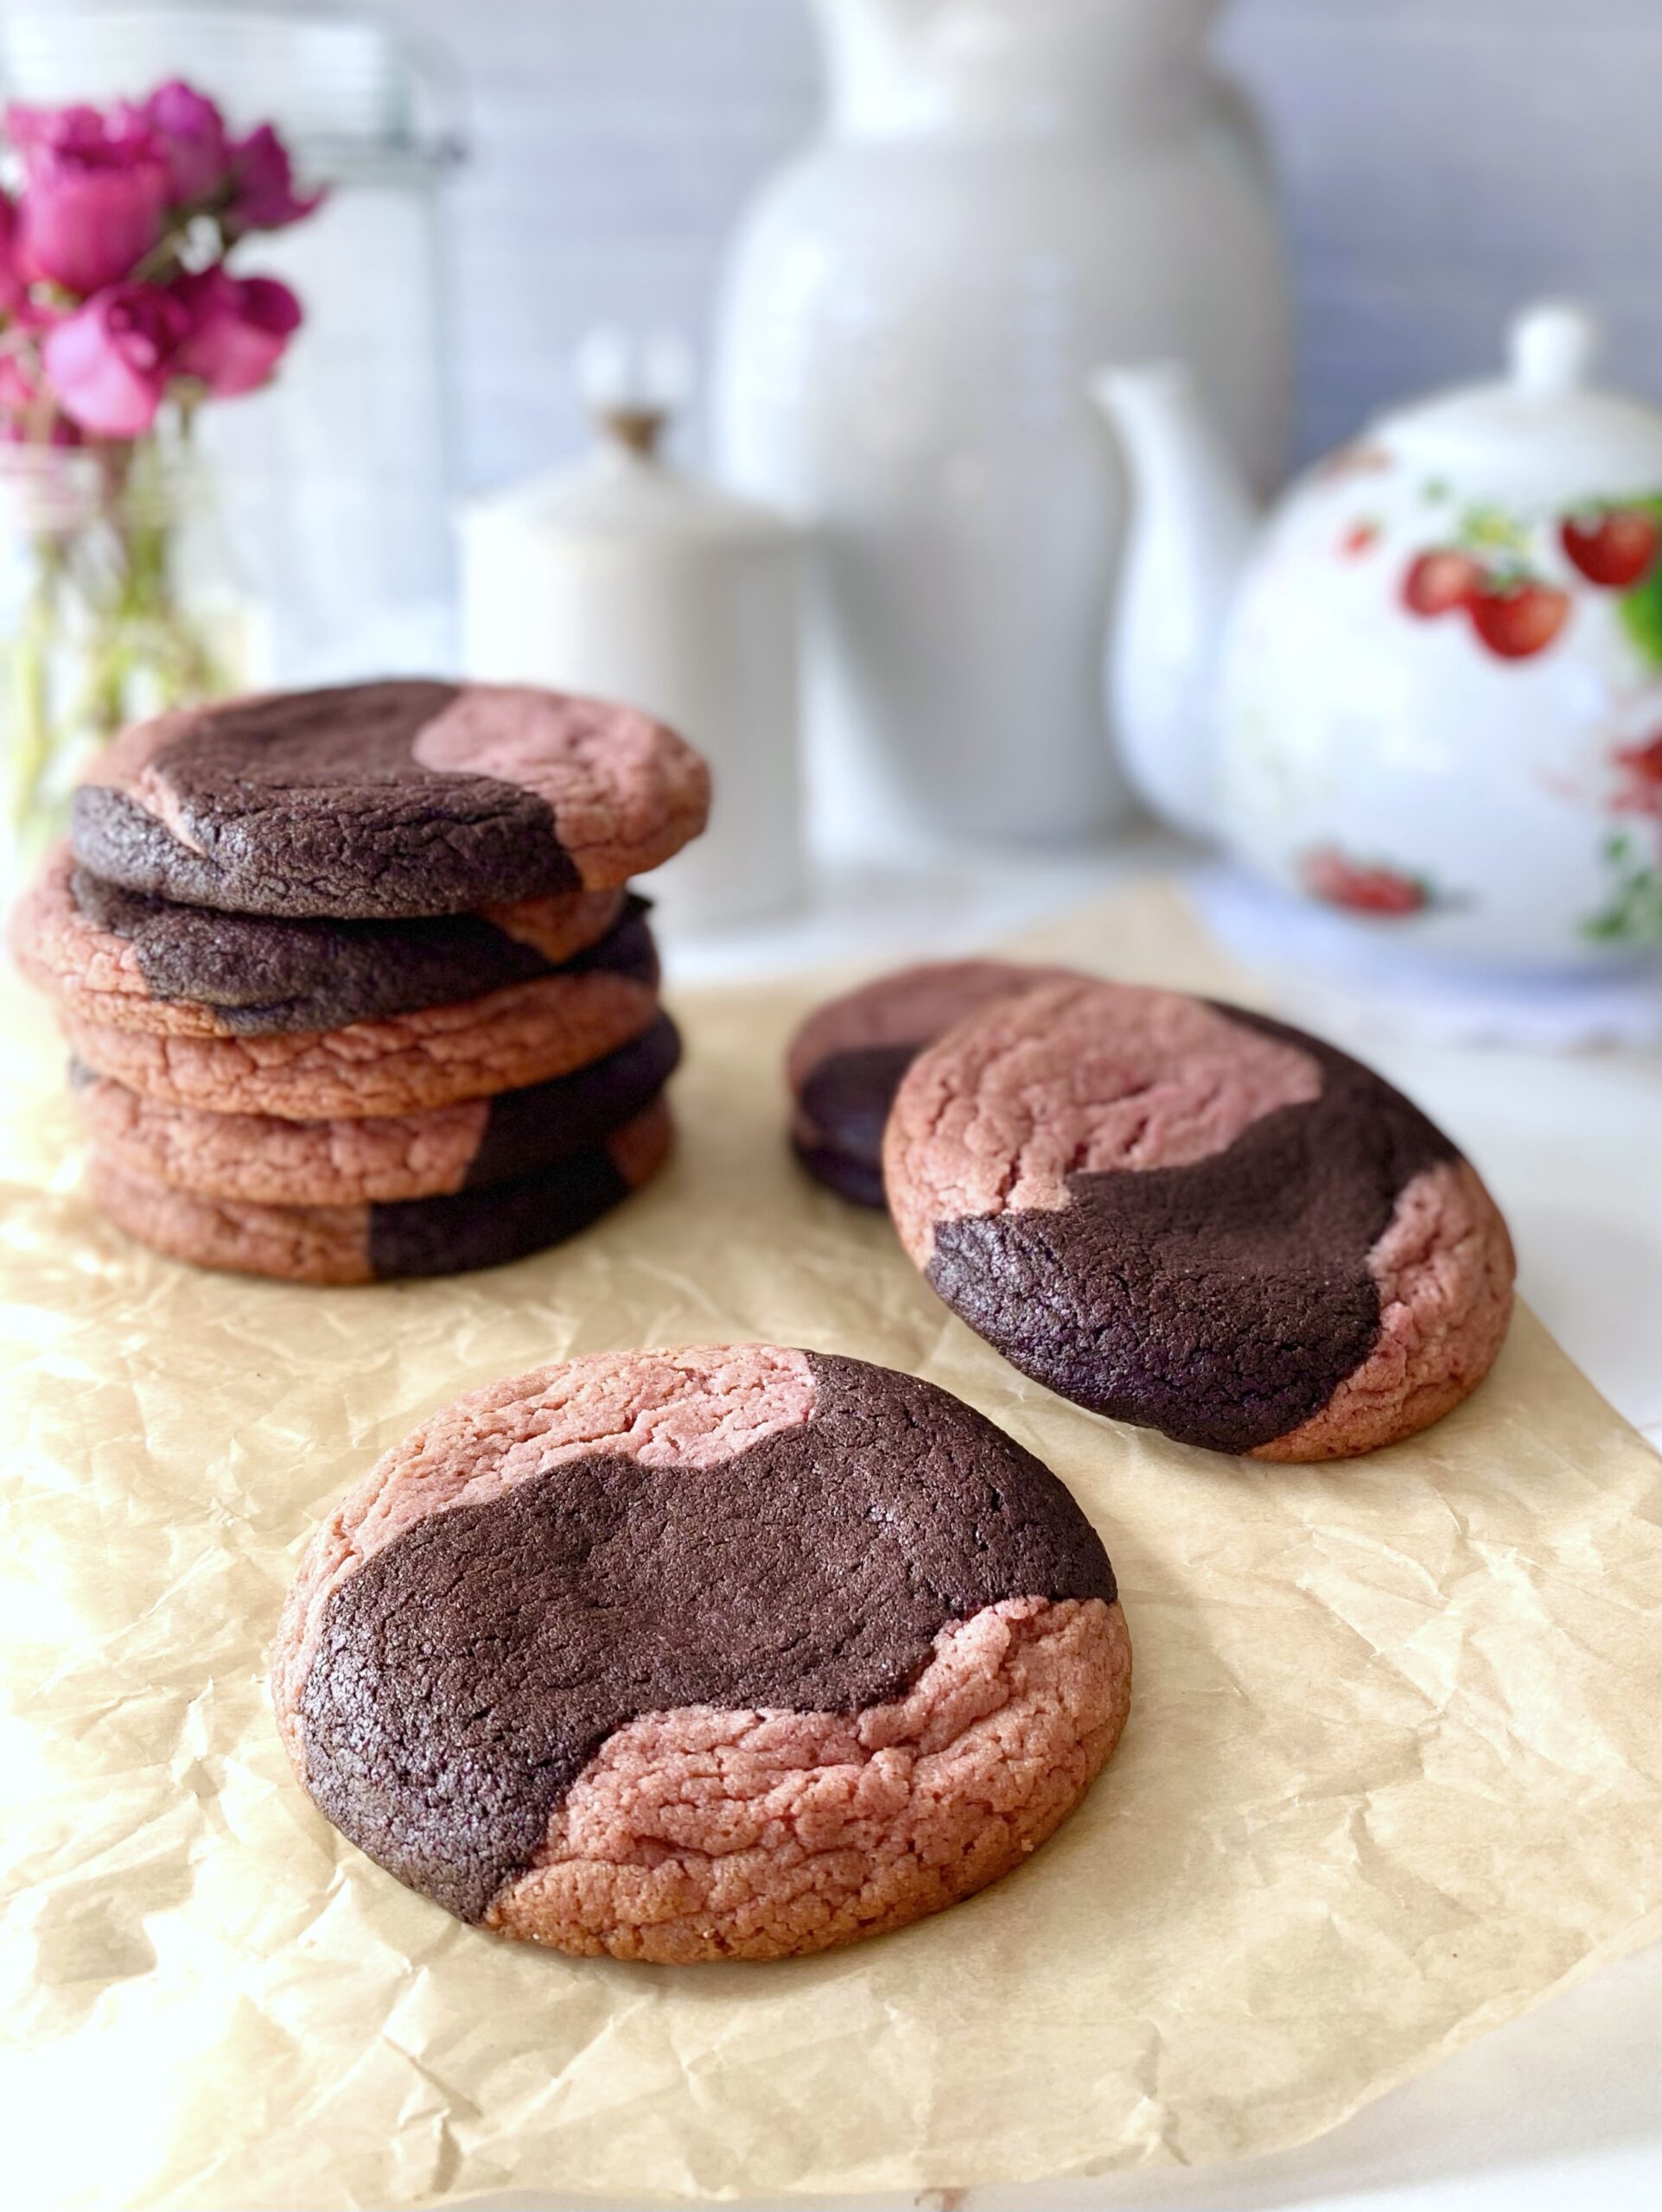
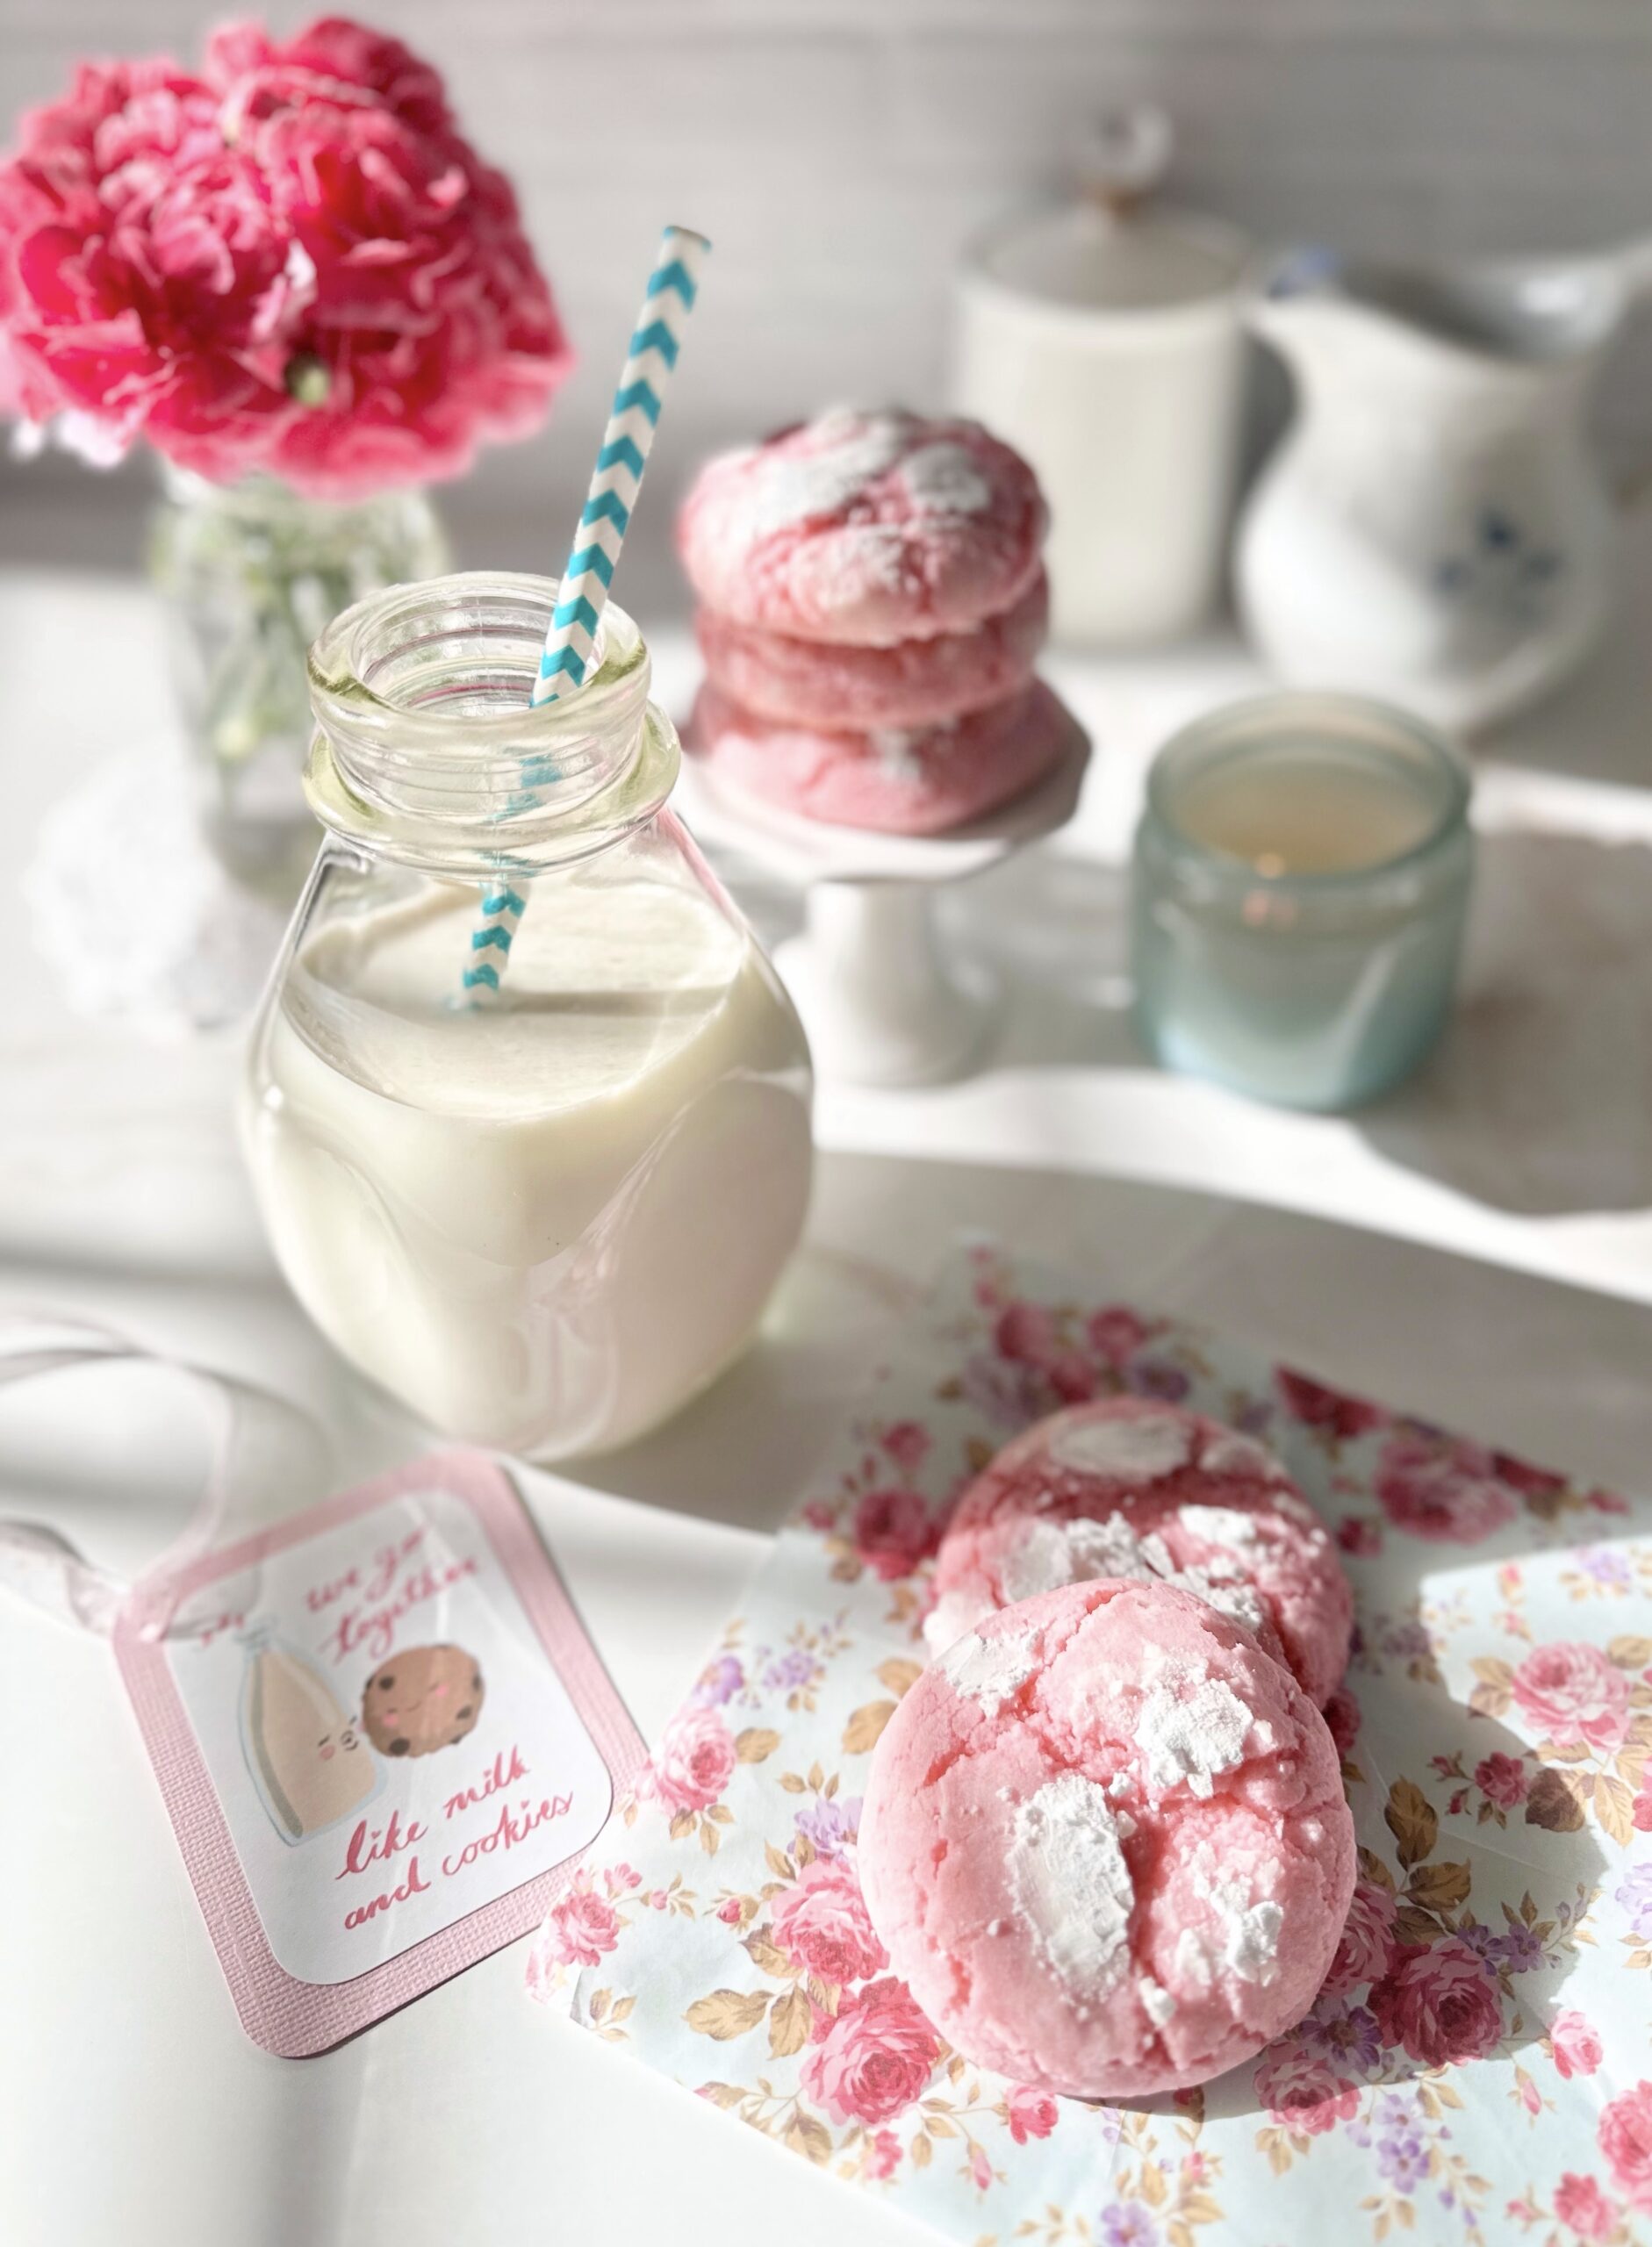
Whenever I walk into a bakery, my eyes are always drawn to anything pink. Pink cupcakes, cookies, donuts or anything with pink icing will inevitably come home with me. This probably started in childhood. Most bakeries back then, including the bakery my aunt always took me to, had pink boxes, so I associate it with delicious, freshly baked treats. Maybe pink desserts do taste better or maybe our minds just tell us that. Either way, if you love pink treats, you’ll love these cookies.

Pink velvet is similar to red velvet, but without the cocoa powder and red food color. The texture should be somewhat velvety, like red velvet cake. I have yet to taste a velvety red velvet cookie, but I think the texture of these cookies is pretty velvety as long as they’re not over baked. Pink velvet desserts are typically vanilla flavored. I upgraded the flavor by adding a touch of cherry flavoring. It’s not enough to give you cherry flavored cookies, but it will add depth to vanilla flavored treats. It’s an old bakery trick that I learned years ago that adds a fruity note in the background.

For best baking results, I recommend using a scale to weigh your ingredients, especially your dry ingredients. If you love baking, you should invest in a food scale if you don’t already have one.

To watch the Pink Velvet Cookies TikTok video, click here. To watch the Pink Velvet Cookies Instagram video, click here.

Pink Velvet Cookies

Pink vanilla flavored crinkle cookies with chewy exteriors and soft, velvety centers
Course Dessert
Servings 14 cookies

Ingredients
  

  • 1 ¾ cups (7 7/8 ounces) all purpose flour, sifted
  • 3 tablespoons (1/2 ounce) cornstarch
  • 1 teaspoon baking powder
  • scant ½ teaspoon fine sea salt
  • ½ cup (4 ounces) unsalted butter, softened
  • 1 cup (7 ounces) sugar
  • 1 tablespoon vegetable oil or neutral oil of your choice
  • 2 large egg whites
  • 1 teaspoon pure vanilla extract
  • ½ teaspoon natural cherry flavoring See notes below*
  • 1 small pea size drop pink gel food color I used Americolor deep pink**

Optional

  • ½ cup white chocolate chips

Instructions
 

  • Preheat oven to 350ºF. Line two large cookie sheets with parchment paper.
  • In a medium bowl, whisk together flour, cornstarch, baking powder, and salt.
  • In a large bowl, cream butter, sugar and oil until light and fluffy.
  • Beat egg whites into butter mixture in two addition, until well combined.
  • Beat in extracts until well combined.
  • Add gel food color, a little at a time with a toothpick, until desired shade of pink is reached. (Adding remaining ingredients will lighten the color slightly.) Beat until evenly distributed.
  • Add flour mixture to batter and beat just until combined. Mix in white chocolate chips if using.
  • Roll dough into balls, about 2 tablespoons each. I used a #30 portion scoop.*** Roll dough very generously in powdered sugar. Place two inches apart onto prepared cookie sheets.
  • Bake until cookies are puffed and tops are set, about 11-13 minutes. Transfer cookies to a cooling rack.

Notes

*The cherry flavoring in this recipe is not intended to make a cherry flavored cookie. The addition of cherry flavoring adds a subtle fruity note. You can also use pure cherry extract. Use a bit less (scant 1/2 teaspoon)  because extracts tend to be stronger than flavorings. DO NOT use imitation cherry extract. It has a medicinal flavor that will disappoint you. If you want your cookies to be cherry or strawberry flavor, reduce vanilla extract to 1/2 teaspoon and  use 1- 1 1/2 teaspoons of natural cherry or strawberry flavoring.
**To find the pink gel food color I used, click here.
***To find the portion scoop I used, click here.
This recipe was updated on 2/14/23.
Keyword cookies, pink velvet

Melt-in-Your-Mouth Peanut Butter Cookie Sandwiches

Soft Peanut Butter Sandwich Cookies

I never imagined that I’d ever be posting a peanut butter cookie recipe. There are already crunchy peanut butter cookies, soft ones, chewy ones, and those peanut shaped store bought ones out there. I mean, do we even need another peanut butter cookie recipe? After I tasted this one, it’s a resounding YES! These soft, tender cookies combined with a silky, smooth filling are a new peanut butter experience that I had to share.

The key to getting the soft texture in the cookie, without being dry, is cake flour. So don’t substitute it, because it’s vital to achieve the correct texture. Make sure to weigh your flour for the most accurate results. The second important ingredient is heavy whipping cream. Just a little added to the filling gives it a luxurious, silky texture.

This recipe makes sixteen medium size peanut butter cookies, which will give you eight sandwiches. If you want more, you can double the recipe or make the cookies smaller. Smaller cookies will have a shorter baking time.

Melt-in-Your-Mouth Peanut Butter Cookie Sandwiches

Course Dessert
Servings 8 cookie sandwiches

Ingredients
  

Peanut Butter Cookies

  • 1 cup (4 1/2 oz or 128g) all purpose flour, sifted
  • ½ cup (2 oz or (57g) cake flour, sifted
  • ½ teaspoon baking soda
  • ½ teaspoon fine sea salt
  • ¾ cup (6 3/4 oz or 191g) creamy peanut butter
  • ¼ cup (2 oz or 57g) unsalted butter, softened
  • ¼ cup (1 5/8 or 47g) vegetable shortening
  • ½ cup (3 1/2 oz or 100g) packed brown sugar
  • ½ cup (3 1/2 oz or 100g) granulated sugar, divided
  • 1 large egg
  • ½ teaspoon pure vanilla extract

Peanut Butter Filling

  • ½ cup (4 1/2 oz or 128g) creamy peanut butter, room temperature
  • 2 tablespoons (1 oz or 28g) unsalted butter, softened
  • ½ cup (2 oz or 57g) powdered sugar, sifted
  • 2 ½ tablespoons (1 1/4 oz or 37ml) heavy whipping cream, room temperature
  • ¼ teaspoon pure vanilla extract
  • Pinch fine sea salt

Instructions
 

Peanut Butter Cookies

  • Preheat oven to 350ºF (180ºC). Line two large baking sheets with parchment paper.
  • In a medium bowl, whisk together the all purpose flour, cake flour, baking soda and salt. Set aside.
  • In a large bowl, beat the peanut butter, butter and shortening until smooth.
  • Beat in the egg and vanilla until well combined.
  • Set aside 1/4 cup (50g) of the granulated sugar. Beat the peanut butter mixture with brown sugar and remaining granulated sugar, with an electric mixer at medium speed, until light and fluffy.
  • Add the flour mixture and beat just until combined.
  • Roll the dough into 1 1/2-inch (3.8cm) diameter balls (about 1 1/4 oz or 35g each). Roll the dough balls in the reserved granulated sugar.
  • Place the dough balls 3 inches apart onto the prepared baking sheets. Flatten with a fork, making a criss cross pattern.
  • Bake until the cookies are puffy and start to crack around the edges, about 9-11 minutes.
  • Let the cookies cool on baking sheet for 1 minute, then carefully transfer them to a cooling rack. The cookies will be fragile, but they will firm up as they cool.
  • Place a spoonful of filling on the bottoms of half of the cooled cookies. Top with remaining the remaining cookies.

Peanut Butter Filling

  • In medium bowl, beat the peanut butter and butter together until smooth.
  • Beat in the powdered sugar, heavy cream, vanilla and salt until smooth.

Notes

To find my favorite cookie sheet, click here.
Keyword cookies, peanut butter

Lavender Shortbread Sandwich Cookies with Honey Buttercream

Lavender Shortbread Sandwich Cookies with Honey Buttercream

Lavender and honey go so well together. Bees know it, fairies know it, princesses know it. The flavor combination is so delightful in these cookies, that I decided to share them with you. In addition to delicious, compatible flavors, these cookies have a divine texture combination. The shortbread cookies have a tender, melt-in-your-mouth texture. Together with the silky, smooth honey buttercream, they’ll make you feel fancy and regal. You’ll hold your head up higher, ring for your tea and declare that you do indeed deserve fine things!

Some people are nervous about baking with lavender because they don’t want their baked goods to taste like soap or perfume. That can be a concern if the lavender flavor is too pronounced. However, if you don’t use enough you won’t be able to taste it at all. There’s a fine balance. If you use the right amount, it will taste pleasant and have sweet undertones. I used two teaspoons of culinary lavender in these cookies, but you can adjust the amount to your tastes. You can start out with one teaspoon, bake a small sample of dough and taste it, to customize the flavor.

Speaking of tasting, my grandmother always said, “taste as you go.” This is also helpful when making the honey buttercream. Typically, when making other flavors of buttercream, you add more powdered sugar if your buttercream is too thin. In this case, adding more powdered sugar can make the buttercream too sweet. Once you have added the amount of honey that tastes good to you, you can add a little cornstarch if you need to stiffen it up a bit.

Lavender Shortbread Sandwich Cookies with Honey Buttercream

Tender lavender scented cookies with silky honey buttercream filling
Servings 18

Ingredients
  

Lavender Shortbread Cookies

  • 2 cups (9 oz or 255g) all purpose flour
  • ½ cup (2 1/4 oz or 64g) powdered sugar
  • ½ teaspoon fine sea salt
  • 1 cup (8 oz or 227g) unsalted butter, softened
  • 2 teaspoons culinary lavender

Honey Buttercream

  • ¾ cup (6 oz or 170g) unsalted butter, softened
  • ½ cup (2 1/4 or 64g) powdered sugar, sifted
  • 2-3 tablespoons honey
  • pinch fine sea salt
  • 1 tablespoon cornstarch optional

Instructions
 

Lavender Shortbread Cookie

  • In a large bowl, sift together the flour, sugar and salt.
  • In a separate large bowl, beat the butter with an electric mixer until smooth. Mix in the lavender. Beat in the flour mixture on low speed, just until combined.
  • Divide the dough into two discs. Wrap in plastic wrap and refrigerate for at least 1 hour, but not more than 8 hours.
  • Line 2 large baking sheets with parchment paper. On a lightly floured surface, roll the dough to 1/4-inch thickness. Cut into 2-inch circles. Place two inches apart on prepared cookie sheets. Refrigerate cut cookies for 30 minutes to 1 hour.
  • Preheat oven to 325ºF (165ºC). Bake cookies until the bottom edges are light golden brown, about 12-14 minutes.
  • Transfer cookies to a cooking rack to cool completely.
  • Pipe or spread about 1/2 tablespoon of buttercream on the bottom of half of the cookies. Top with remaining cookies.

Honey Buttercream

  • In a medium bowl, beat butter and sugar together until smooth. Add honey, one tablespoon at a time until desired sweetness and consistency is reached.
  • Mix in a pinch of salt to taste.
  • Mix in cornstarch, if necessary, to firm up buttercream. *See notes below.

Notes

*The addition of cornstarch helps to firm up buttercream without adding additional sweetness.
To find culinary lavender, click here.
Keyword cookies

Lemon Crinkle Cookies

Lemon Crinkle Cookies by Brownie Mischief
Click here to watch the video

Crinkle cookies, also known as crackle cookies, have been around for a very long time. The pretty, crispy, cracked exterior and the soft, moist interior are what we love about them! There’s definitely no shortage of recipes for crinkles out there, everything from chocolate to red velvet. I even saw an audacious cookie company selling lemon crinkles for twelve dollars each, more money than it will cost for this entire batch! So many of the recipes I tried were disappointing, especially the ones made with cake mix. So I created my own version which happened to go viral! Here’s to making sure delicious lemon crinkle cookies are available for all to enjoy.

This recipe requires a bit of chilling, which I know many people don’t like because they’re impatient. I happen to be one of those people. Old fashioned crinkle cookies require about 3 hours of chilling. My recipe has the addition of cornstarch, which helps prevent spreading and allows for a shorter chilling time. As an added bonus, cornstarch makes the cookies more tender. Win win!

Fresh lemon zest and lemon juice in these cookies is crucial to the best lemon flavor. A bit of pure lemon extract is added to enhance that flavor. Don’t be tempted to use imitation extracts. The flavor will disappoint you. I added two drops of lemon yellow food color, which made them so pretty they look like pure sunshine!


Lemon Crinkle Cookies

Lemon cookies with a crackled, crispy exterior and a soft, tender interior
Course Dessert
Servings 14 cookies

Ingredients
  

  • 1 ¾ cups (223g) all purpose flour, sifted
  • ¼ cup (28g) cornstarch
  • 1 teaspoon baking powder
  • ½ teaspoon fine sea salt
  • ¼ teaspoon baking soda
  • ½ cup (113g) unsalted butter, softened
  • 1 cup (200g) granulated sugar
  • Zest of 1 large lemon
  • 1 large egg
  • 2 tablespoons (30ml) fresh lemon juice
  • 1 teaspoon pure lemon extract
  • ½ teaspoon pure vanilla extract
  • 1-2 drops yellow gel food coloring (optional) *I used Americolor lemon yellow
  • ½ cup (60g) powdered sugar

Instructions
 

  • In a medium-sized bowl, whisk together the flour, cornstarch, baking powder, salt and baking soda until well blended.
  • In a large bowl, beat the butter, sugar and lemon zest together until pale and fluffy. Beat in the egg until well incorporated. Mix in the lemon juice, extracts and food coloring until well combined. Add the flour mixture and mix just until combined.
  • Refrigerate the cookie dough for 30 minutes to one hour.
  • Meanwhile, preheat the oven to 350ºF (180ºC). Line two large cookie sheets with parchment paper.
  • Roll the dough into balls, about 2 tablespoons each. I used a #30 portion scoop*. Roll the dough balls generously in powdered sugar.
  • Place the dough balls about 2 inches apart onto the prepared baking sheets.
  • Bake until the cookies are set, about 10-12 minutes. Let them cool on the cookie sheet for 1 minute then transfer to a cooling rack.

Notes

*To find Americolor lemon yellow gel food color, click here.
**To find a #30 cookie scoop, click here.
To find the striped wax paper pictured above, click here.
 

Dark Chocolate Strawberry Marble Cookies

Dark Chocolate Strawberry Marble Cookies

To the indecisive German baker who invented marble cake, I thank you! Marble cake, sampler platters and tasting flights are the perfect solution for those times when you just can’t decide. Let’s take one more decision off the table. No longer will we have to decide between chocolate and strawberry cookies. These marble cookies are the best of both worlds. Chocolate and strawberry are opposites in many ways, but complement each other so well. After all, who doesn’t love chocolate covered strawberries?

The dark chocolate cocoa powder gives these cookies a deep chocolate flavor. Freeze dried strawberries provide the sweet strawberry flavor and color. I crushed the strawberries with a mini food processor, but you can also use a mortar and pestle, a clean spice grinder or a sturdy plastic bag and a rolling pin. When you crush the 1 1/2 cups of freeze dried strawberries called for in the recipe, you’ll end up with about 1/3 cup of strawberry powder. To find freeze dried strawberries, click here.

This recipe makes about eighteen cookies but you can also make nine large cookies. Follow the instructions in parentheses for large cookies.


Dark Chocolate Strawberry Marble Cookies

by Mari Vasseur
Dark chocolate & strawberry marbled sugar cookies
Course Dessert
Servings 18 cookies

Ingredients
  

  • 2 ¼ cups (284g) all purpose flour, sifted
  • 1 teaspoon baking soda
  • 1 teaspoon fine sea salt
  • 1 cup (227g) unsalted butter, softened
  • 1 cup (200g) granulated sugar
  • ½ cup (100g) packed brown sugar
  • 2 large eggs
  • 1 teaspoon pure vanilla extract
  • 1 ½ cups (35g) freeze-dried strawberries, finely crushed to a powder (1 1/2 cups before crushing)
  • â…“ cup (28g) dark unsweetened cocoa powder

Instructions
 

  • In a medium-sized bowl, whisk together the flour, baking soda and salt until well blended.
  • In a large bowl, beat the butter, granulated sugar and brown sugar, with an electric mixer at medium speed, until pale and fluffy.
  • Beat in the eggs and vanilla extract in three separate additions, making sure each addition is incorporated before adding the next. On low speed, mix in flour mixture just until combined.
  • Divide the dough in half. Leave half of dough in the bowl and place the other half in a separate bowl.
  • Add the freeze dried strawberries to half of the dough and mix just until combined. Add the cocoa powder to the other half of the dough and mix just until combined.
  • Roll the dough into 1 1/2 teaspoon size balls. (For large cookies, roll the dough into tablespoon size balls.) To form the cookies, place two chocolate dough balls and two strawberry dough balls in your hand in a checkerboard pattern. Roll into a ball. Repeat with the remaining dough balls and refrigerate for 30 minutes.
  • Preheat oven to 350ºF (180ºC). Line two large cookie sheets with parchment paper.
  • Place the dough balls about two inches apart on the prepared cookie sheets. Bake 10-12 minutes, until cookies are set and edges are golden. (For large cookies, bake 14-15 minutes.) Transfer to cooling rack. (For large cookies, cool on cookie sheet one minute, then transfer to cooling rack.
Keyword chocolate, cookies, marble, strawberry

Marshmallow Mudslide Cookies

marshmallow mudslide cookies

Have you ever had mudslide cake? It’s a deliciously messy chocolate cake with chocolate frosting and marshmallows, also known as Mississippi mud cake. I saw one covered in a layer of marshmallow fluff and it made its way into my dreams. I woke up with the inspiration to make a cookie version of the gooey mudslide cake.

I saw a few mudslide cookie recipes out there that used standard size marshmallows and chocolate chips mixed into the cookie dough. If you’ve ever baked with marshmallows, you know that they nearly disappear during the baking process. Chocolate chips melt beautifully into little pools of chocolate, but then harden once cooled to room temperature. I happily volunteered to address these challenges! After some trial and error, I created a satisfying cookie with plenty of gooey marshmallow goodness and a rich fudge filling that stays soft at room temperature. Dreams do come true!

marshmallow mudslide cookies


Marshmallow Mudslide Cookies

by Mari Vasseur
Chocolate & nut fudge-filled cookies topped with toasted marshmallows
Course Dessert
Servings 22 cookies

Ingredients
  

Fudge filling

  • 1 â…“ cup (227g) semisweet chocolate chips
  • 1 cup (319g) sweetened condensed milk
  • â…” cup (74g) chopped toasted pecans or walnuts

Cookies

  • 2 â…› cups (287g) all purpose flour, sifted
  • ½ cup (45g) unsweetened Dutch Process cocoa powder, sifted preferably dark
  • ½ teaspoon baking powder
  • ½ teaspoon baking soda
  • ¼ teaspoon fine sea salt
  • 1 cup (227g) unsalted butter, softened
  • 2 large eggs
  • 1 teaspoon pure vanilla extract
  • 1 cup (200g) granulated sugar
  • ¼ cup (50g) packed brown sugar
  • 22-24 *s'mores marshmallows or jumbo marshmallows I used Kraft Jet-Puffed S'moreMallows

Instructions
 

Fudge filling

  • Melt the chocolate chips and sweetened condensed milk together in a double boiler or in the microwave in a medium-sized microwave safe bowl.
  • Stir in the chopped nuts. Set aside to cool to room temperature.

Cookies

  • Preheat the oven to 350º (180ºC). Line 2 large cookie sheets with parchment paper.
  • In a medium-sized bowl, sift together the flour, cocoa powder, baking powder, baking soda, and salt until well blended.
  • In a large bowl, beat the butter, granulated sugar and brown sugar with an electric mixer at medium speed, until pale and fluffy. Mix in the eggs and the vanilla in 3 separate additions, making sure each addition is incorporated before adding the next. On low speed, mix in the flour mixture in 2 additions, just until combined.
  • Roll the fudge filling into tablespoon-sized balls.
  • Roll the cookie dough into 2-tablespoon-sized balls then flatten them into disks. Place a ball of fudge filling in the middle of each disk. Wrap the cookie dough around the ball of filling, sealing it completely.
  • Place the cookies about 2 inches apart onto the prepared baking sheets. Bake until the tops of the cookies are set, about 9-11 minutes. Remove from oven.
  • Turn on the broiler. Place a marshmallow on top of each cookie.
  • Broil the cookies until the marshmallows are toasted. This takes about 1 minute. CAUTION: Watch the cookies carefully when broiling. They can go from done to burnt in the blink of an eye!

Notes

*I used Kraft Jet-Puffed S'moreMallows, but if you're unable to find them, use jumbo marshmallows. Cut them in half lengthwise with kitchen shears. Place on cookies cut side down.
**To melt fudge filling in microwave, heat for 30 seconds. Stir, then microwave for 10 second intervals, stirring until melted.
Keyword chocolate, cookies